# Discount Image

How to display <mark style="color:green;">**Discount**</mark> <mark style="color:green;">**Image**</mark> and <mark style="color:green;">**Upsell Products**</mark> on the Post Purchase Checkout using the <mark style="color:green;">**Notifications -> Content**</mark> option? A Step by Step Guide.

{% embed url="<https://drive.google.com/file/d/1ah1heKEL31ophPjXqKd0kWbKr2VJCKOG/view?usp=sharing>" %}

## Guide

1. Go to the store [<mark style="color:green;">**Settings**</mark>](https://admin.shopify.com/settings) <mark style="color:green;">**->**</mark> [<mark style="color:green;">**Checkout**</mark>](https://admin.shopify.com/settings/checkout).

<figure><img src="/files/6yiROaDhMx1euO5aXRnH" alt="" width="563"><figcaption></figcaption></figure>

2. Make sure that the [<mark style="color:green;">**HypeUp - Post Purchase app**</mark>](https://admin.shopify.com/apps/upsell-app30) is selected for the post purchase checkout page.

<figure><img src="/files/gfiAO3nZhayCz0Vhw7XX" alt="" width="563"><figcaption></figcaption></figure>

3. Create a new [<mark style="color:green;">**Scenario**</mark>](https://admin.shopify.com/apps/upsell-app-30/scenarios).

<figure><img src="/files/gEgXCRSRa3lVDa4cU36N" alt="" width="563"><figcaption></figcaption></figure>

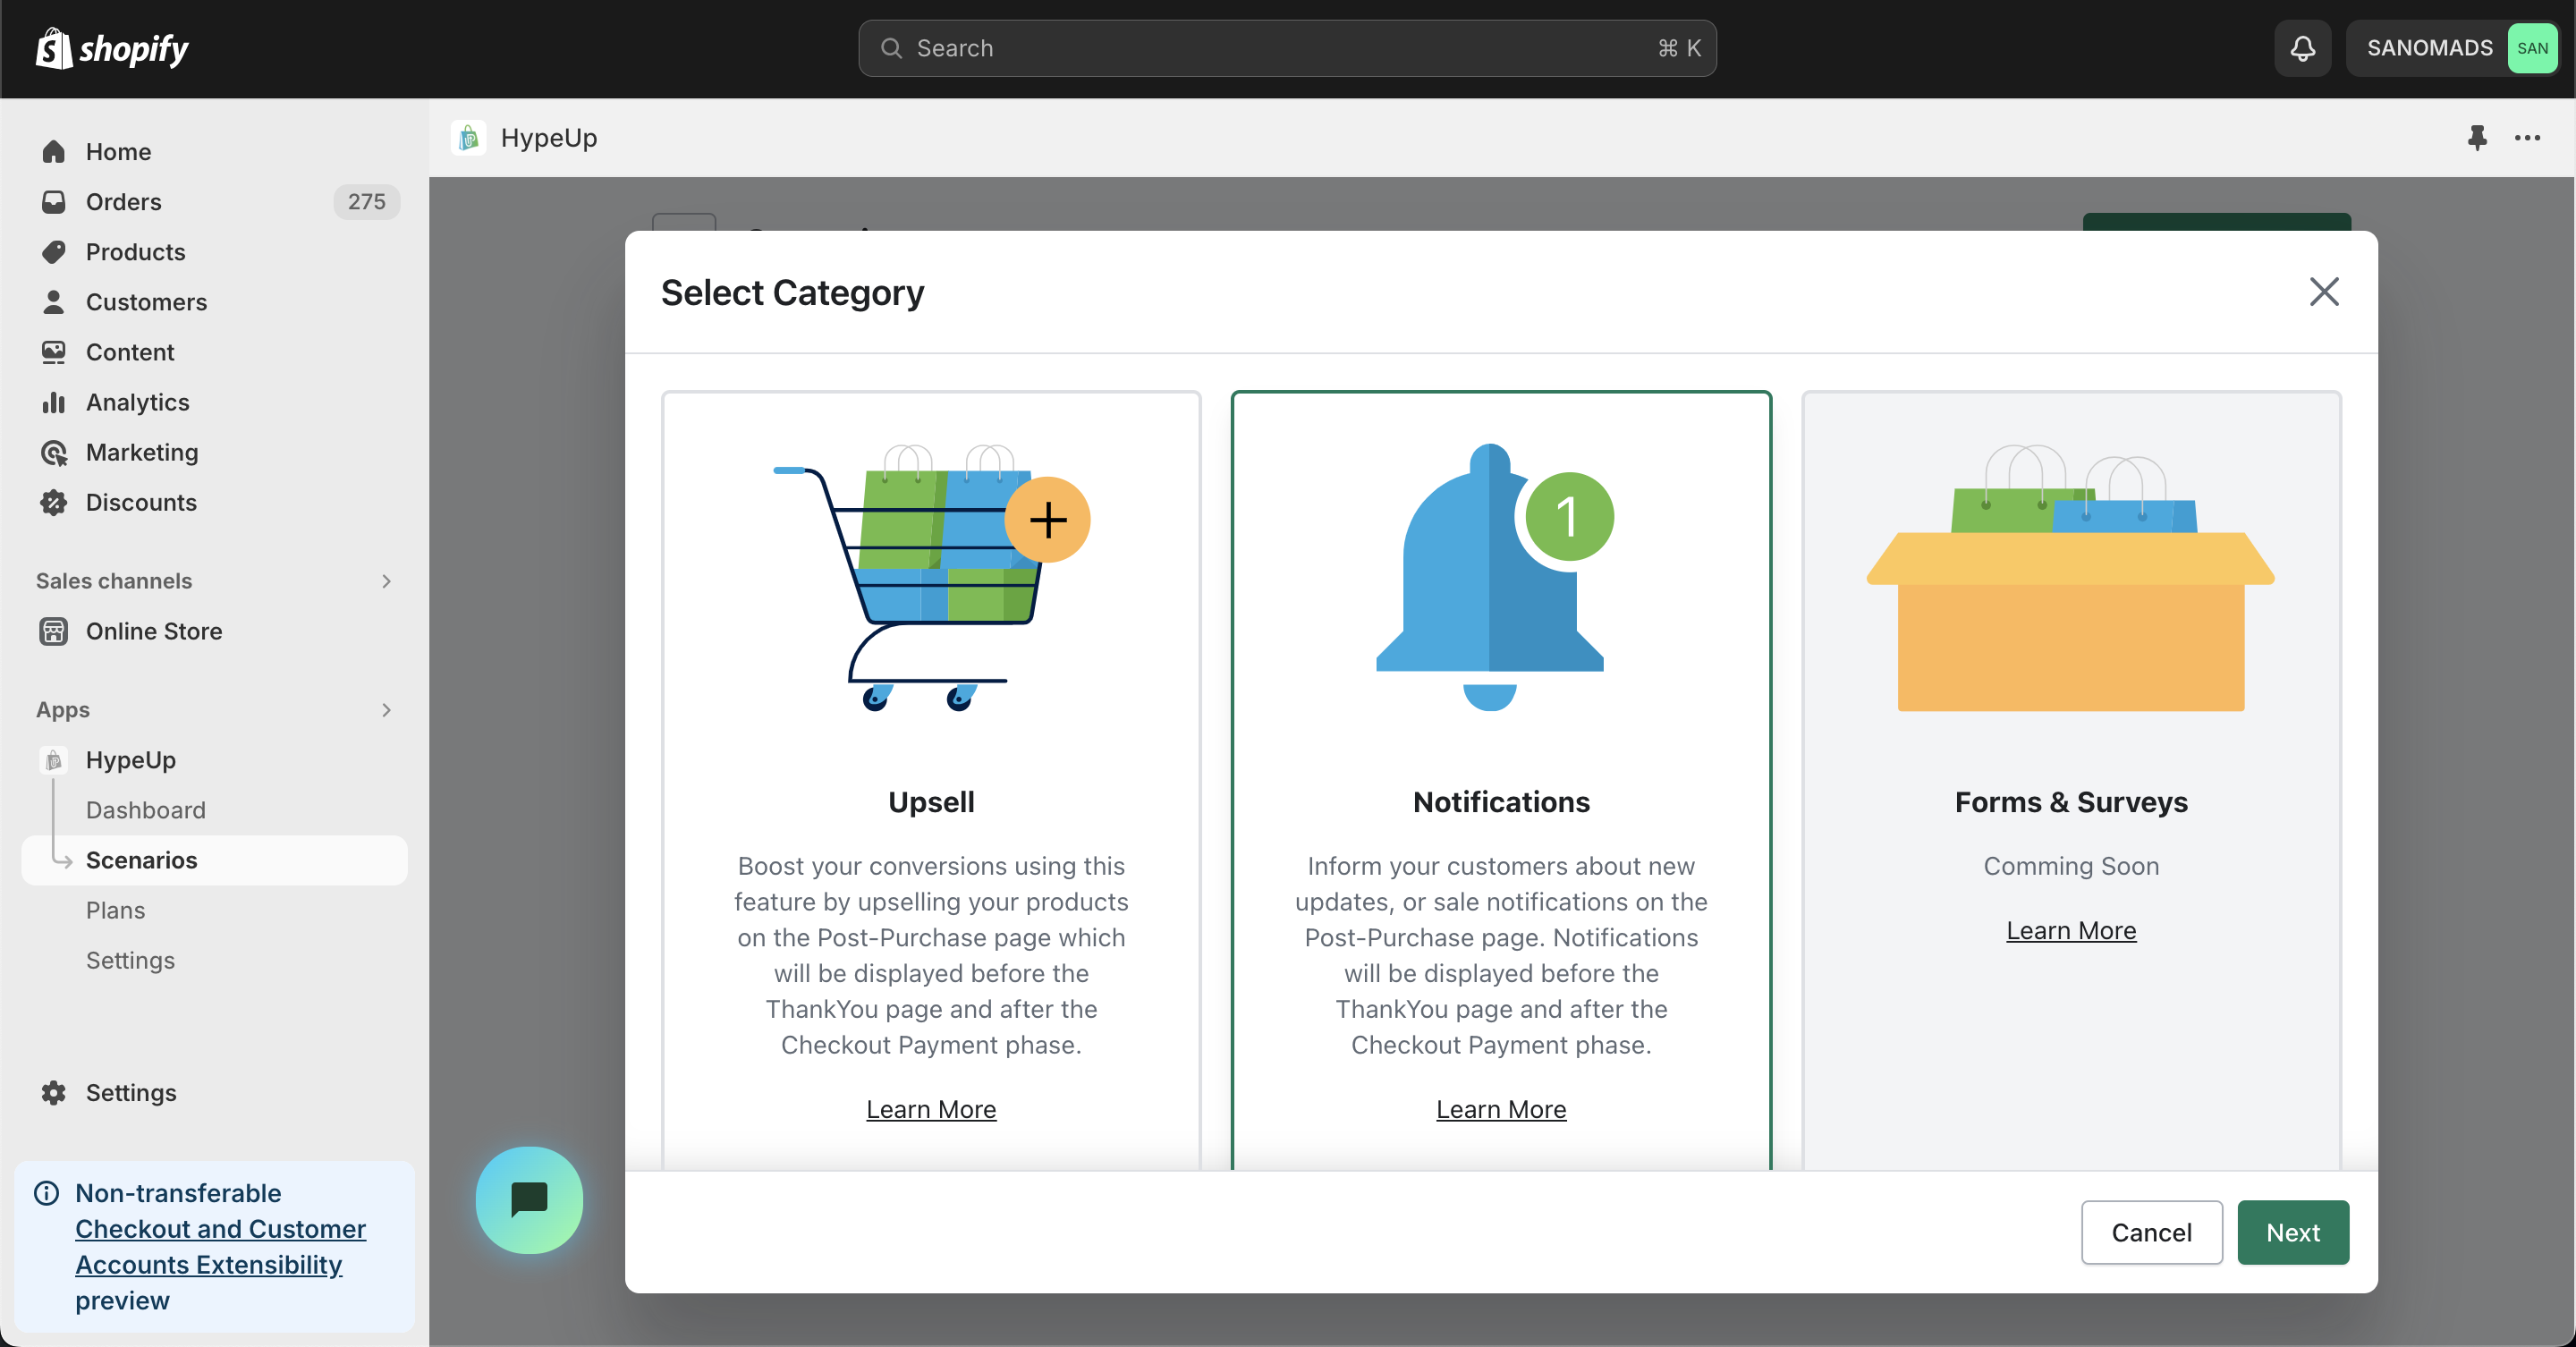
4. Select the <mark style="color:green;">**Notifications**</mark> category.

<figure><img src="/files/7oxX3YwXW7a0vq3nPc40" alt="" width="563"><figcaption></figcaption></figure>

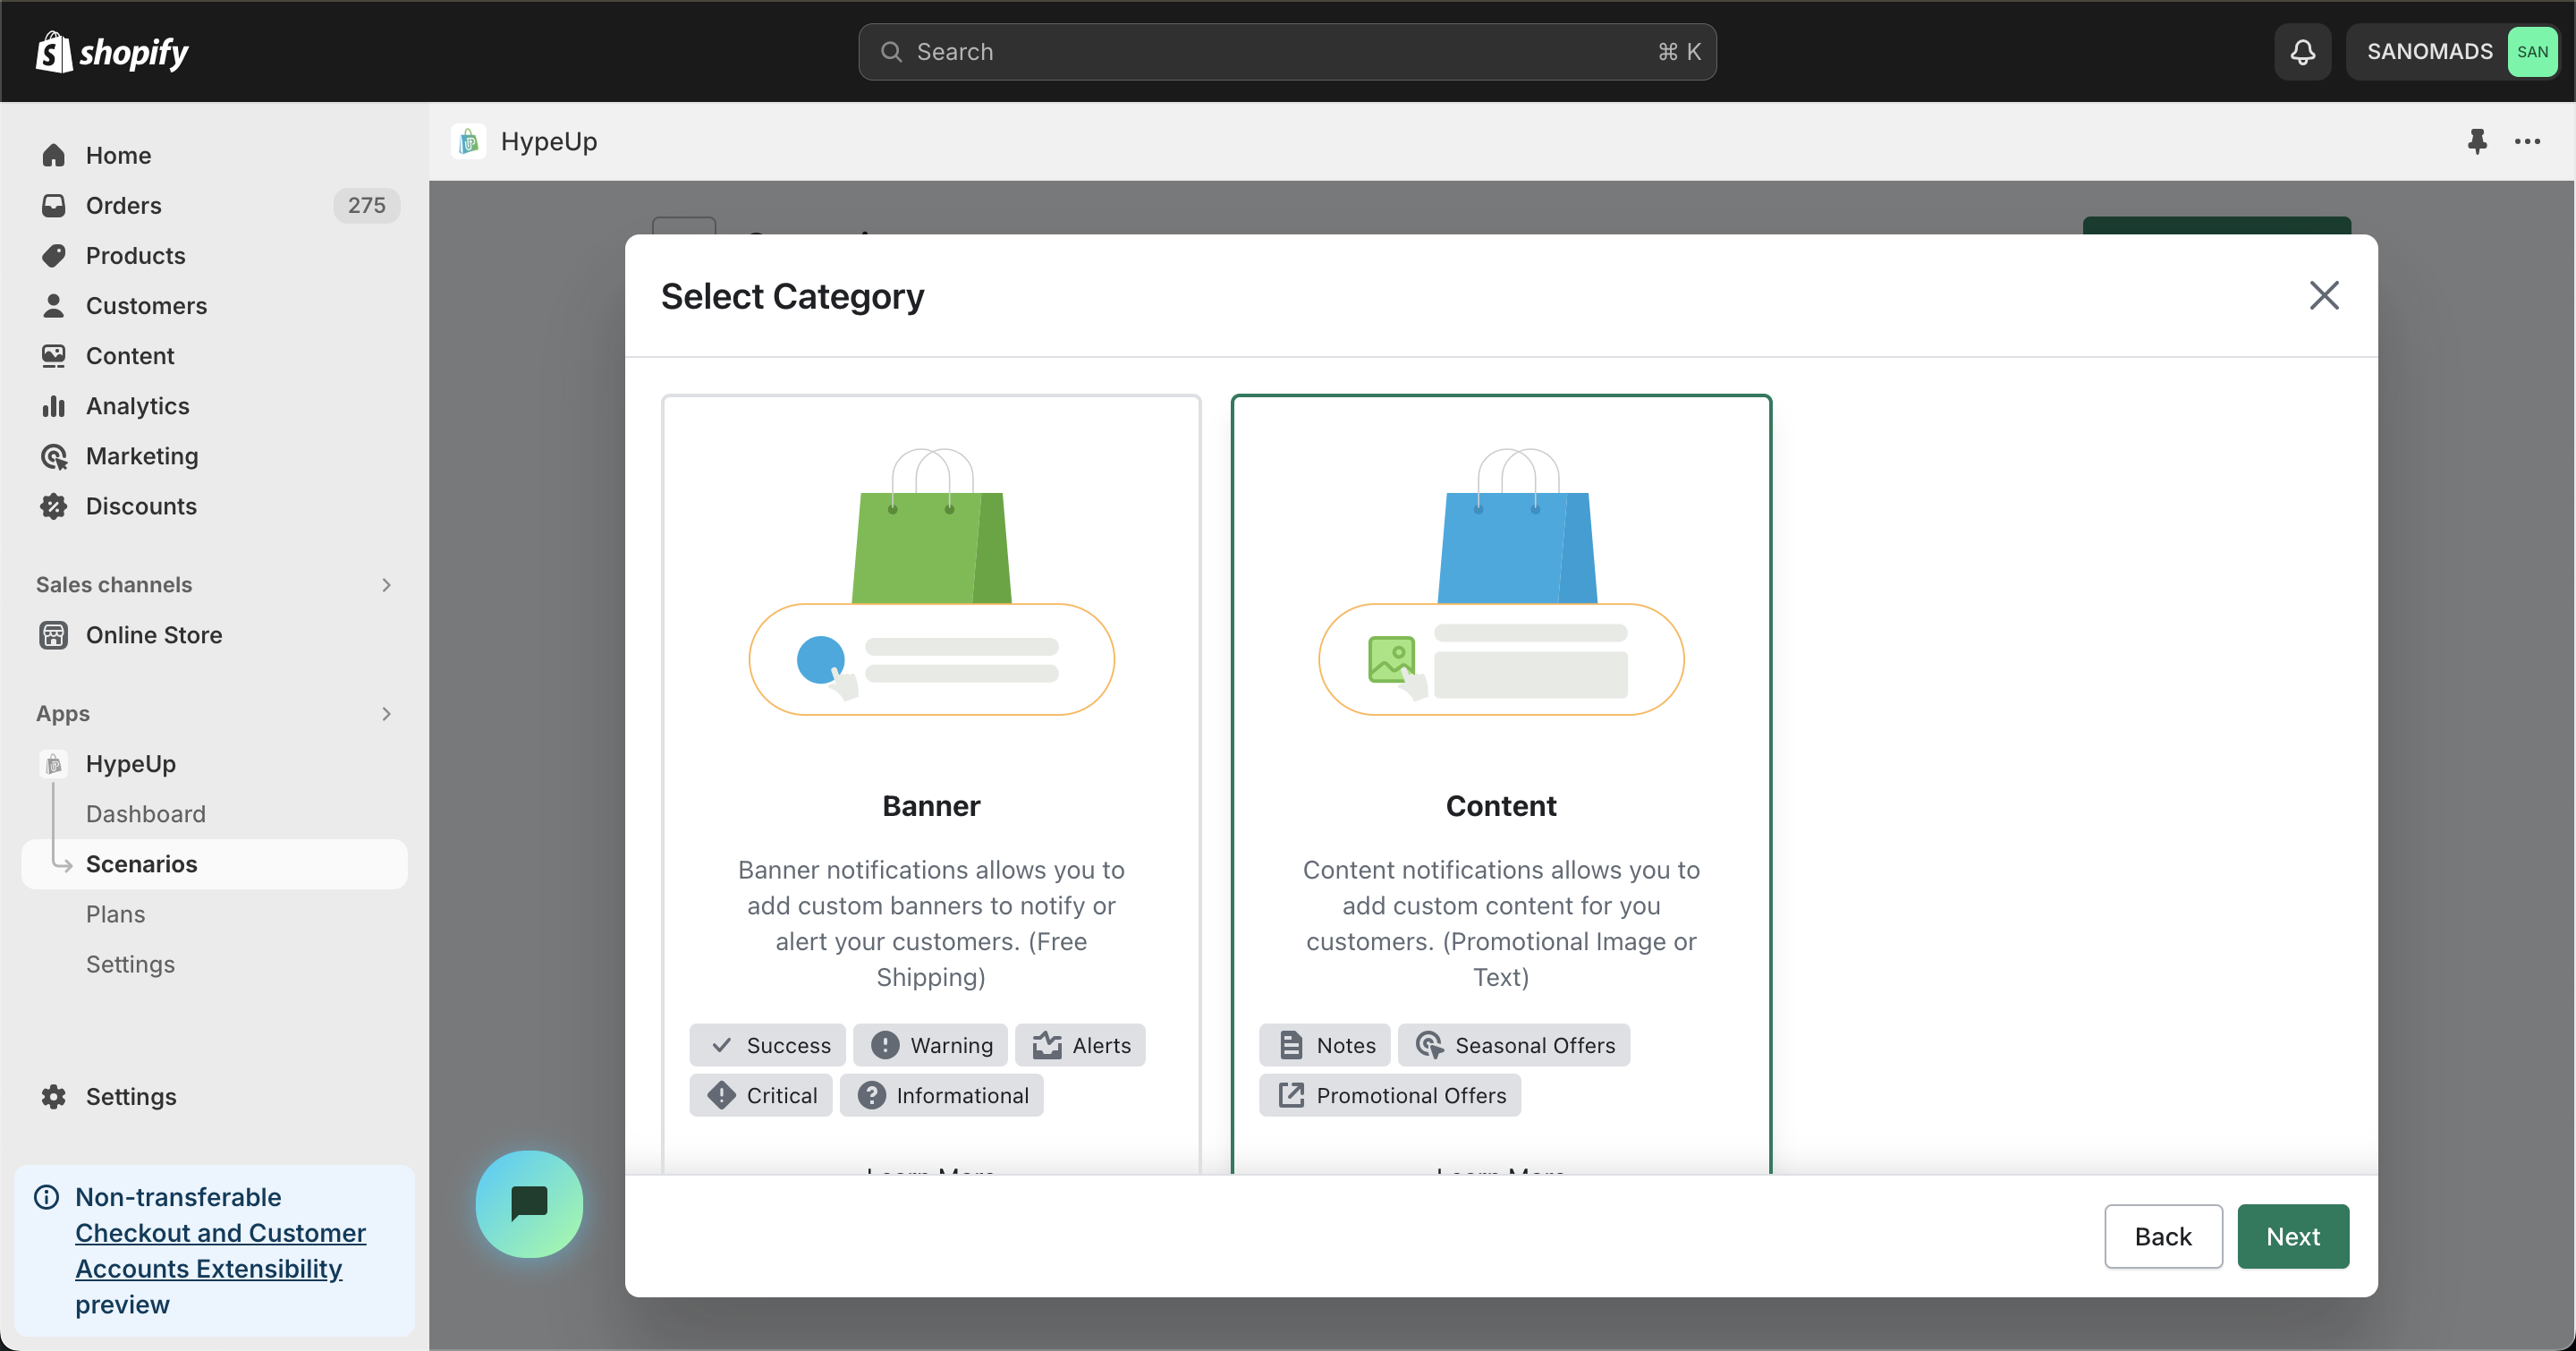
5. Select <mark style="color:green;">**Content**</mark>, a notifications type from the options for displaying the image or text on the post purchase checkout page.

<figure><img src="/files/nZ8fb8ssS8Qcdnwn7Wio" alt="" width="563"><figcaption></figcaption></figure>

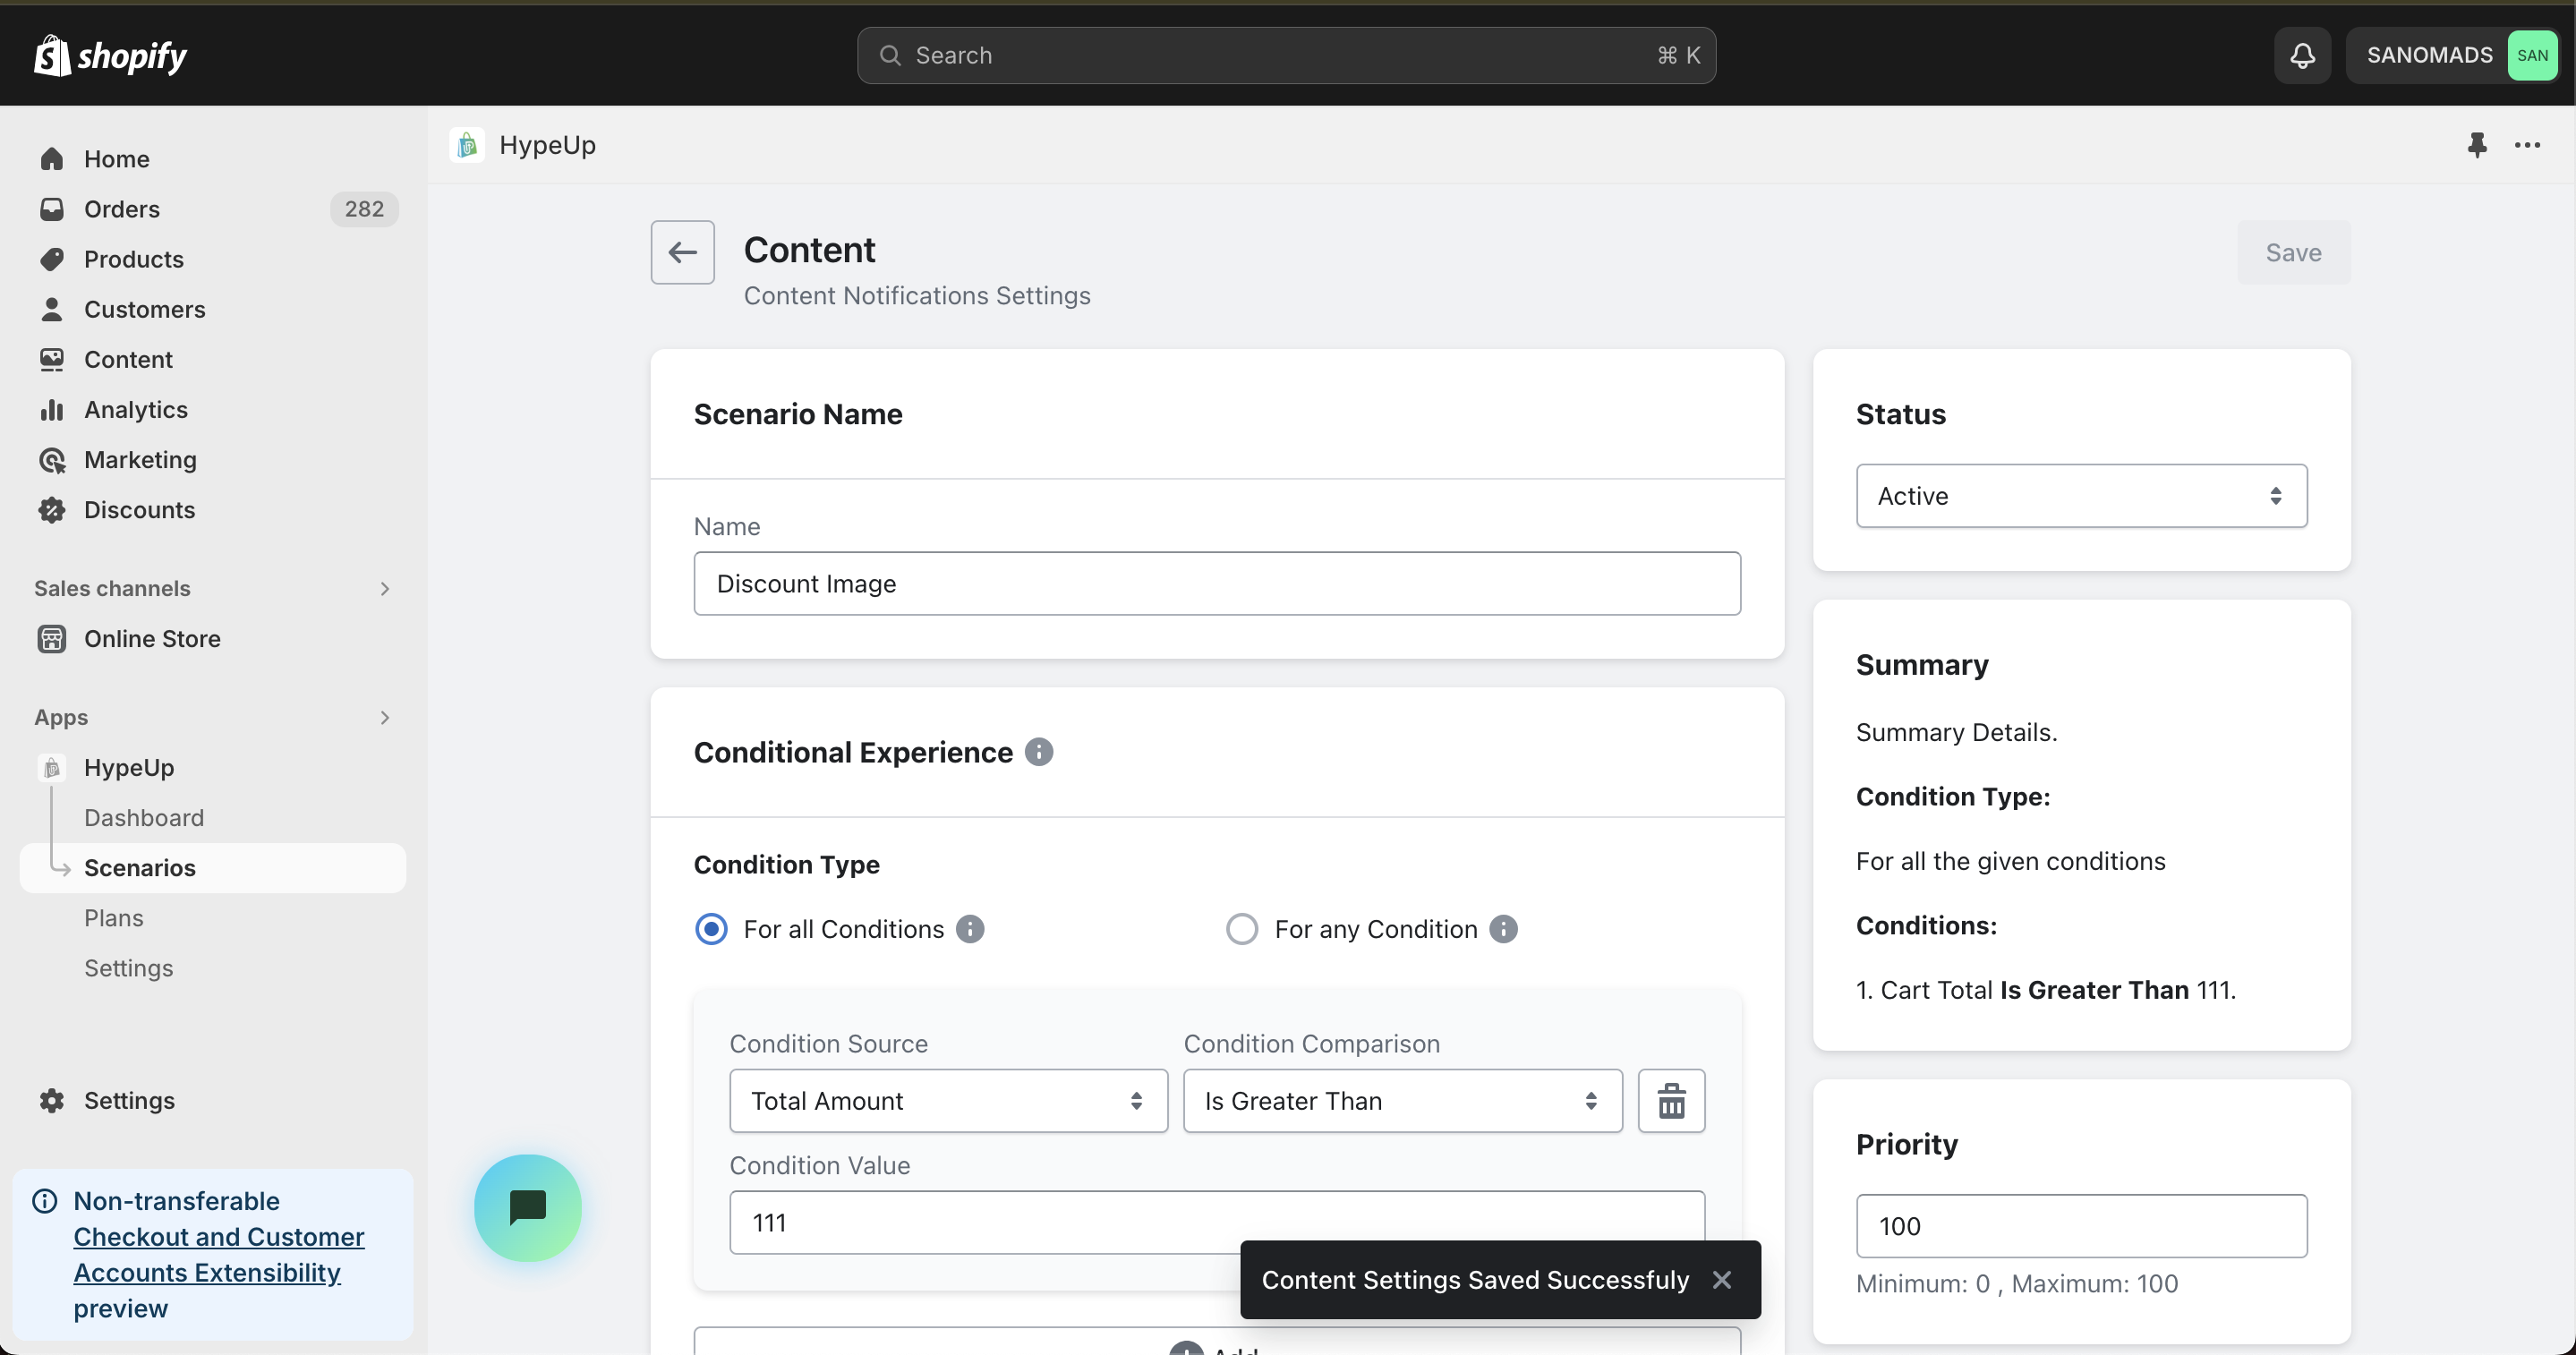
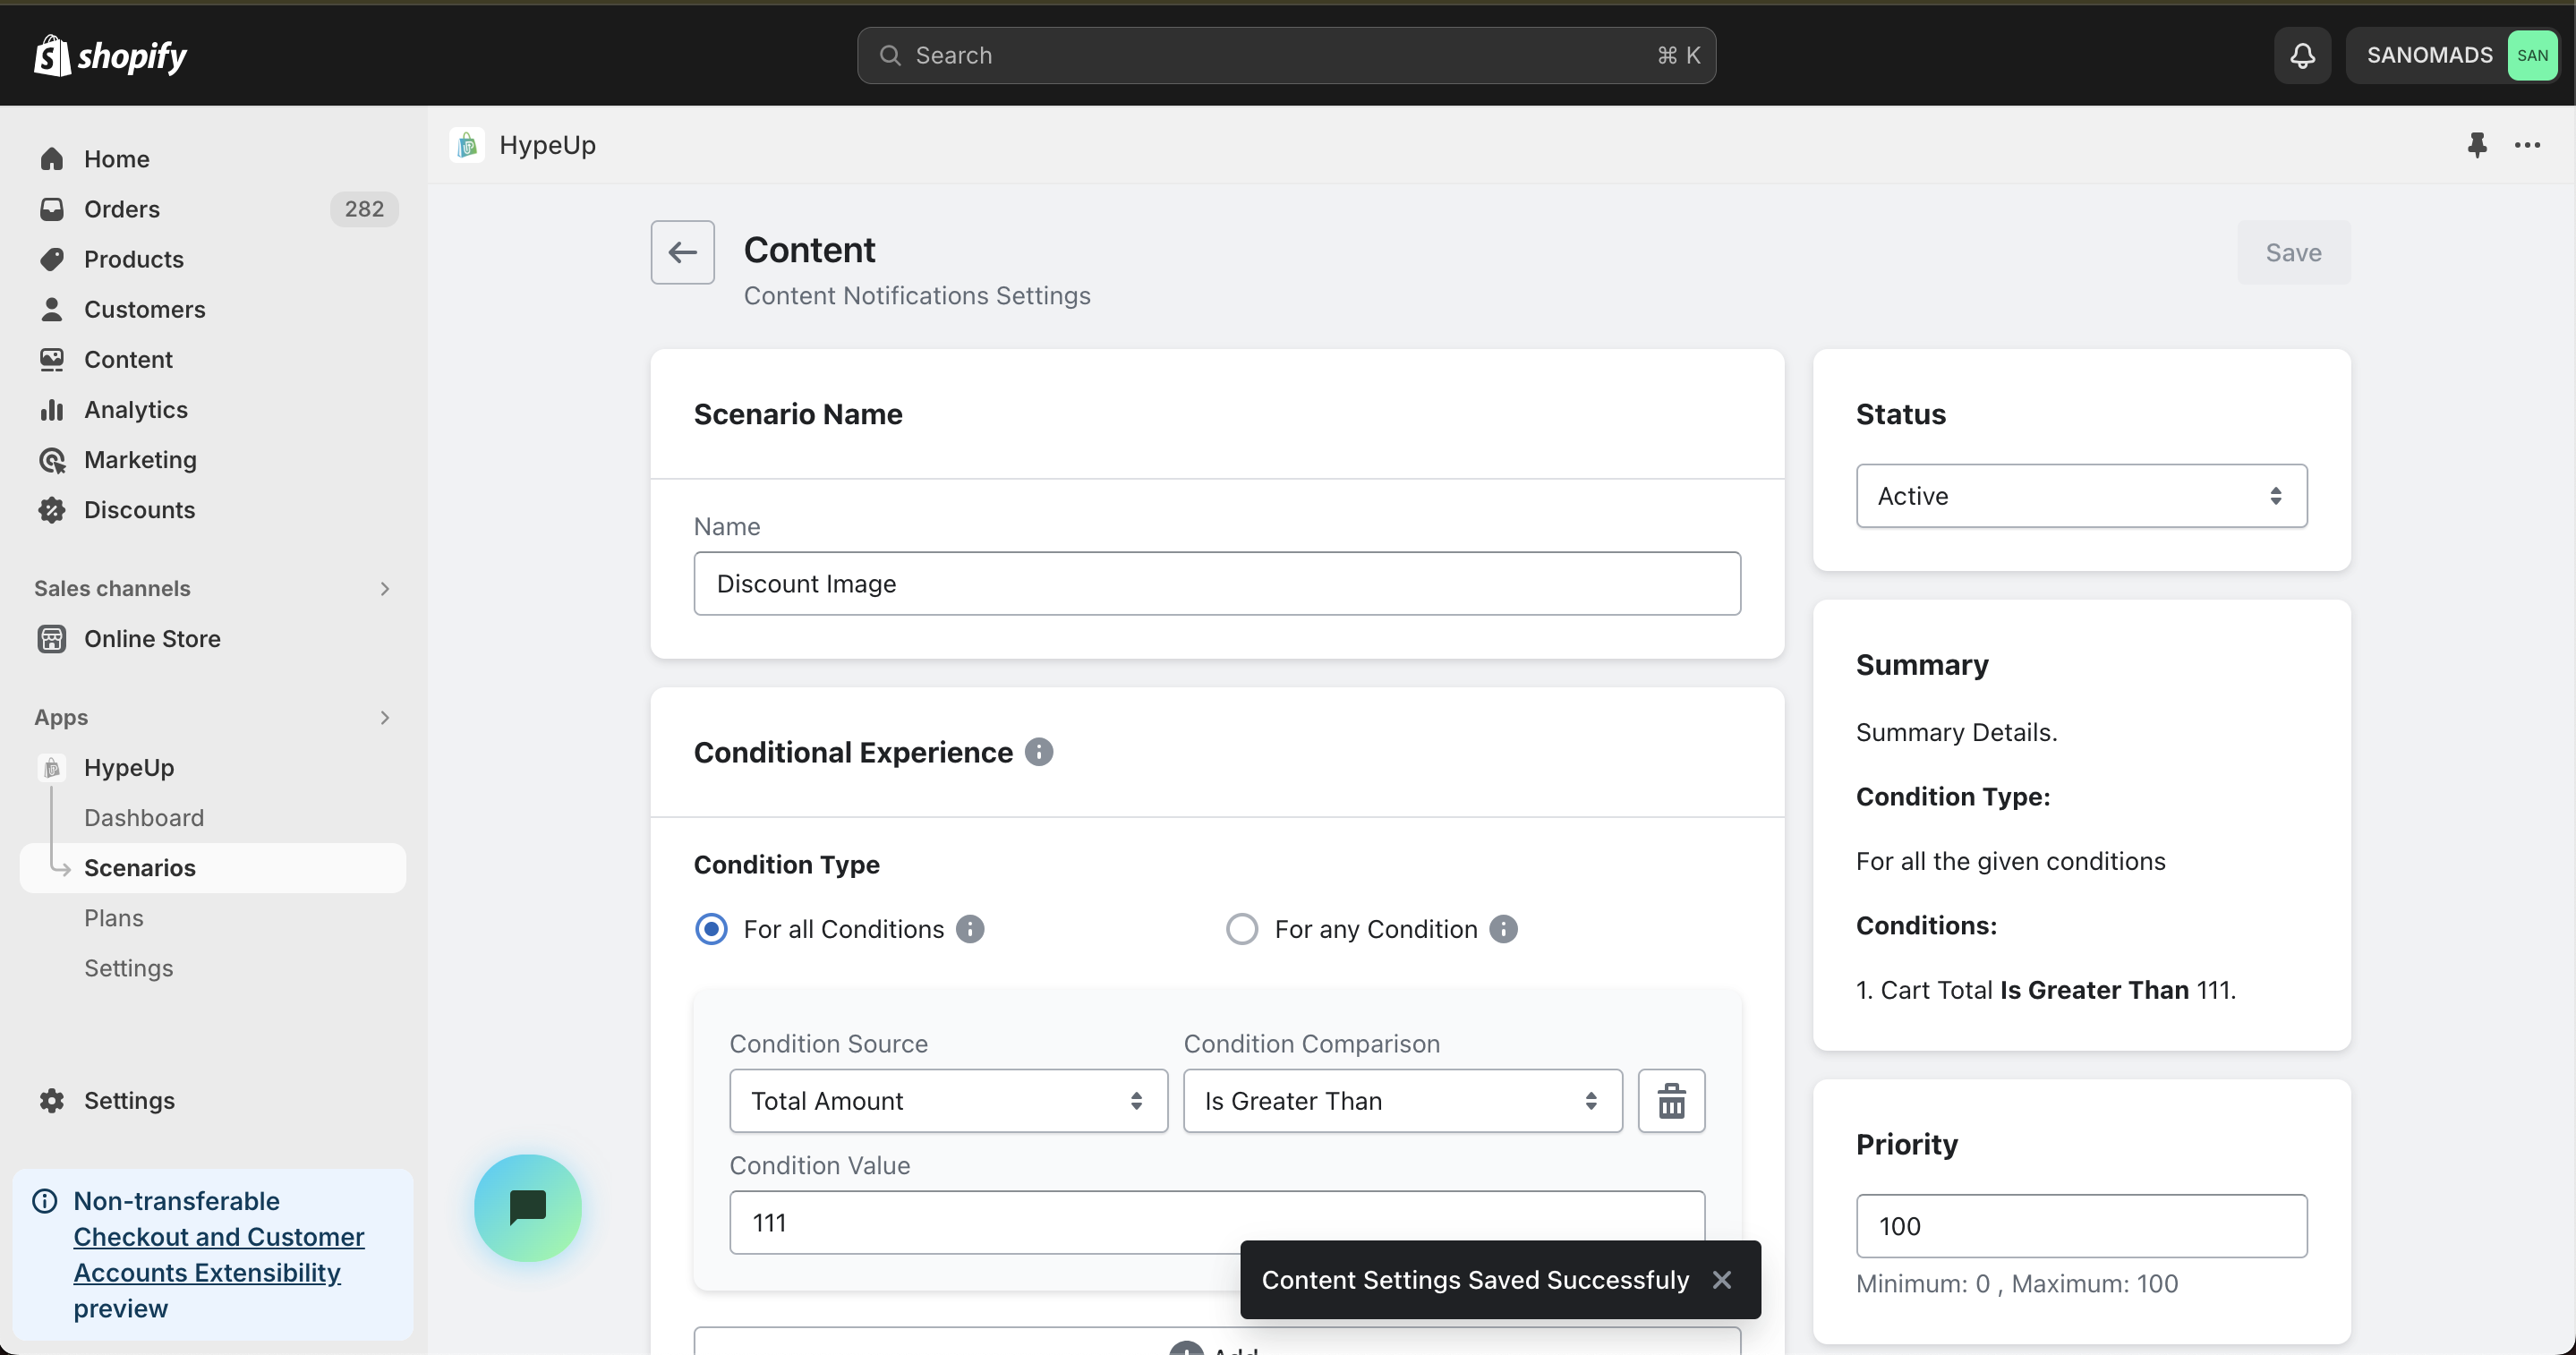
6. Add multiple <mark style="color:green;">**conditions**</mark> to handle the visibility of the scenario on the post purchase checkout page.

<figure><img src="/files/kjs5FAjgMOJRcDe19cut" alt="" width="563"><figcaption></figcaption></figure>

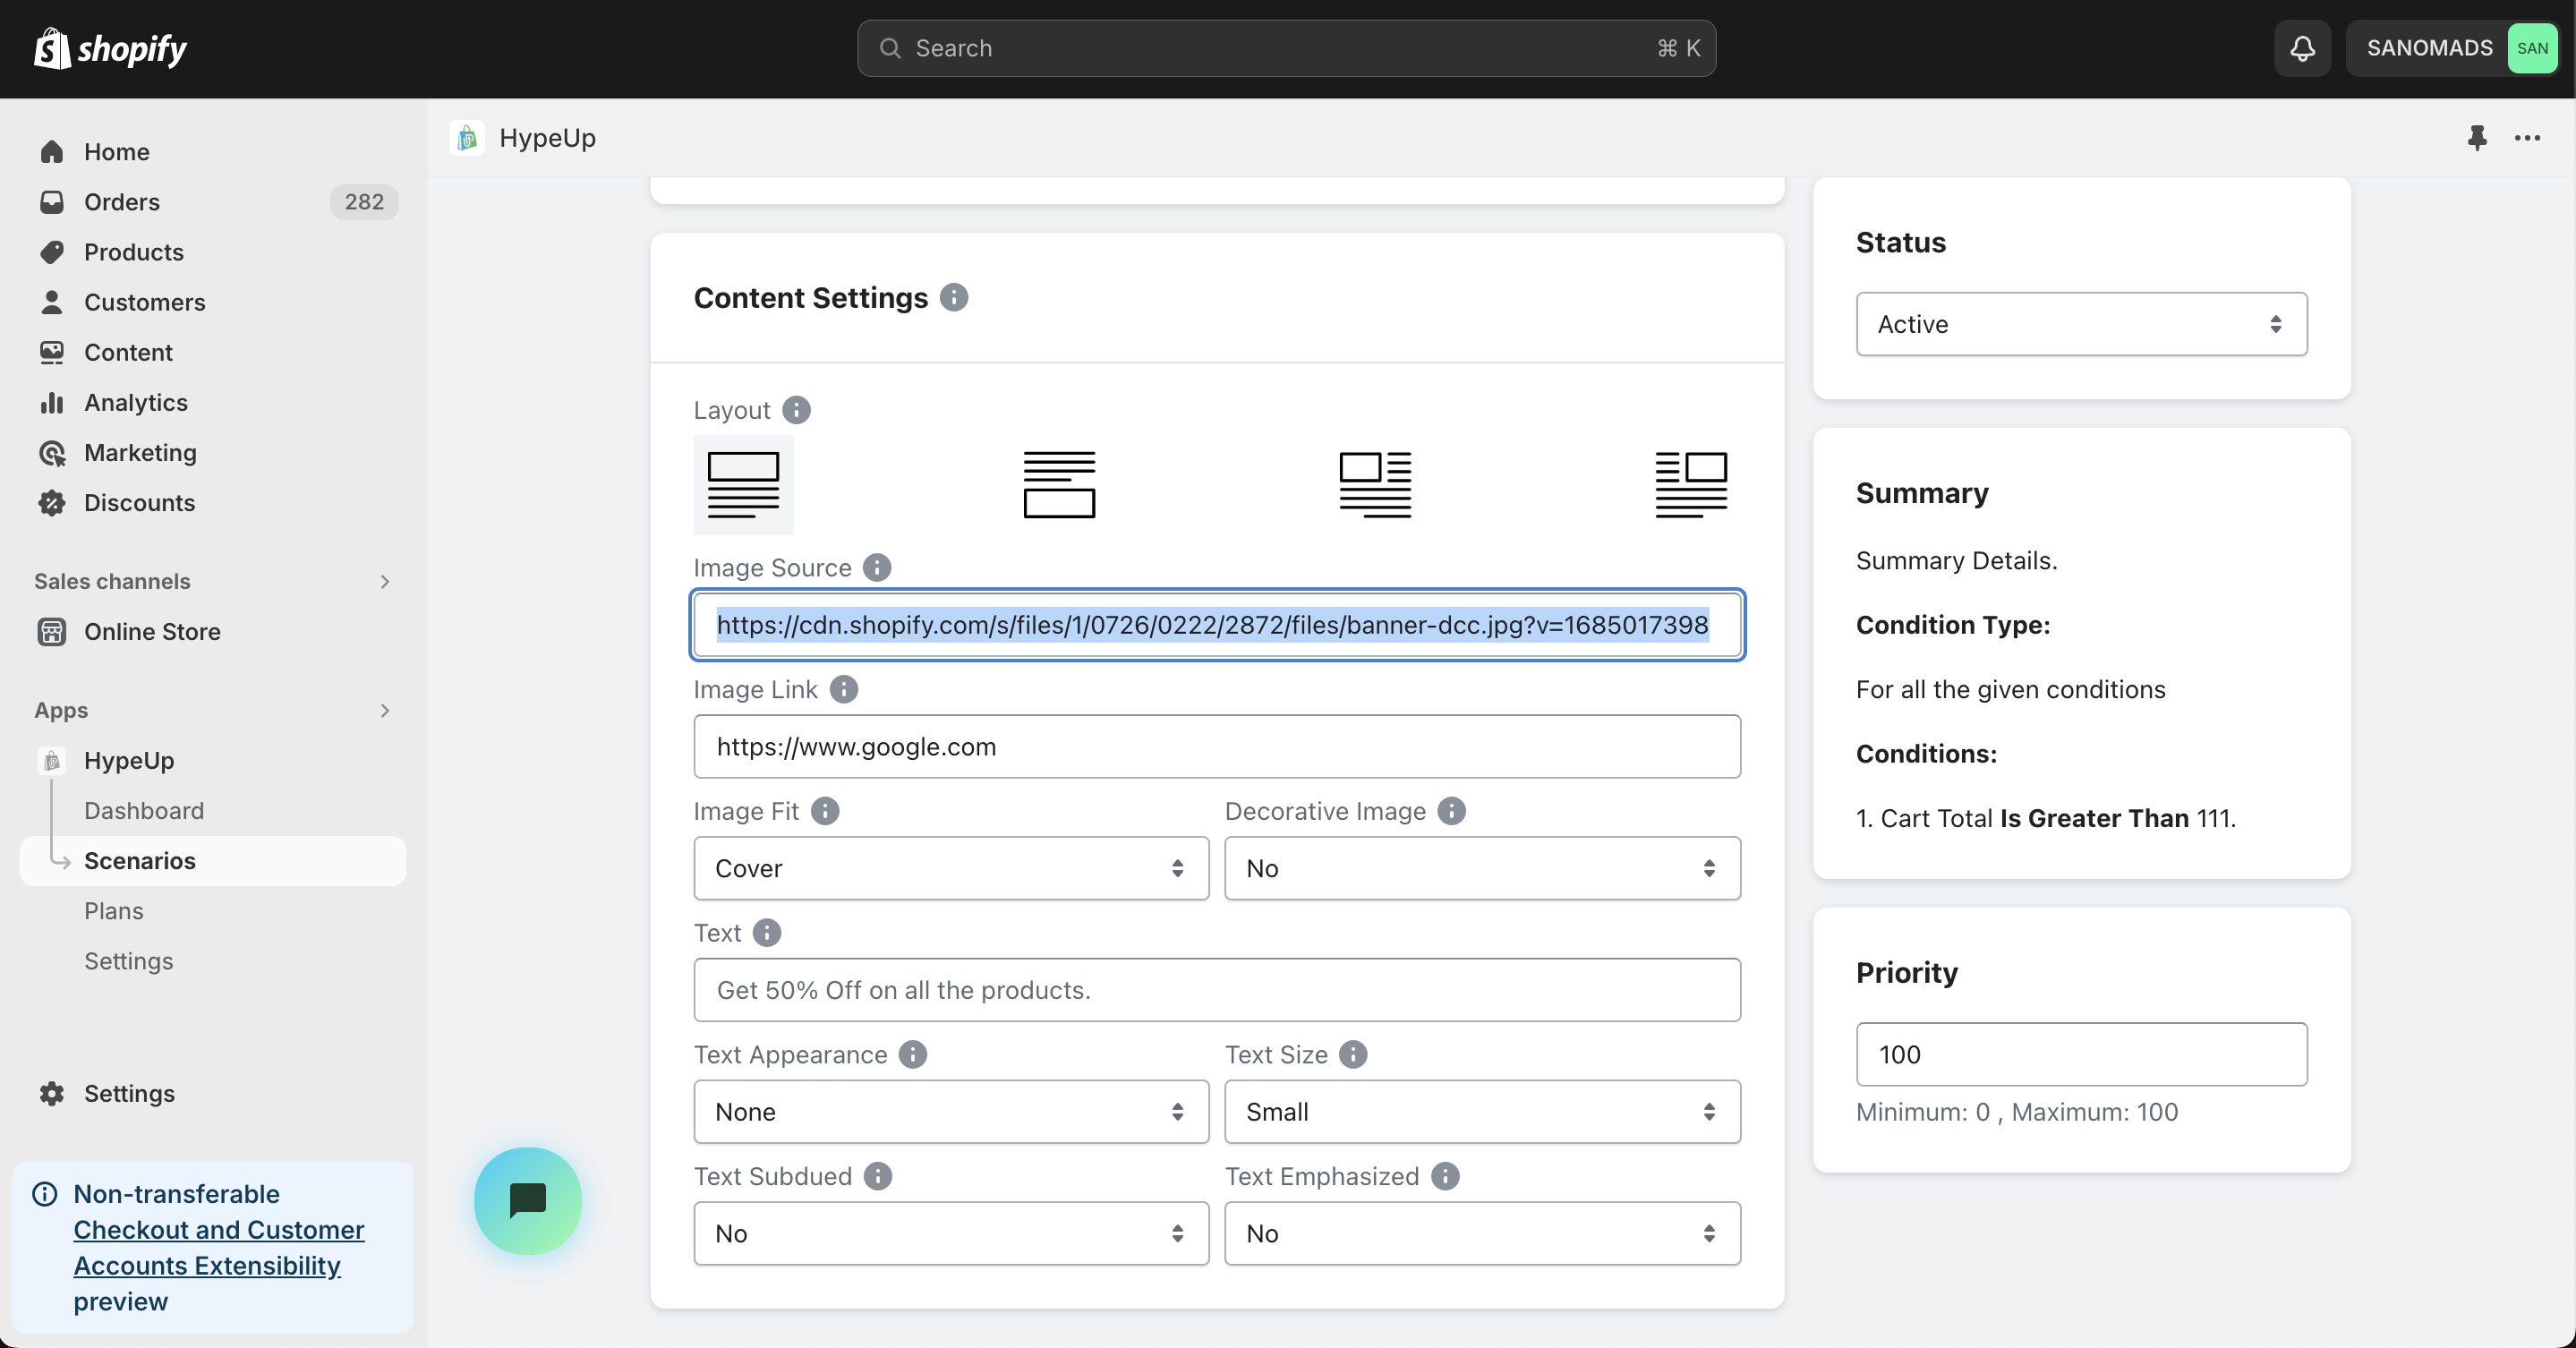
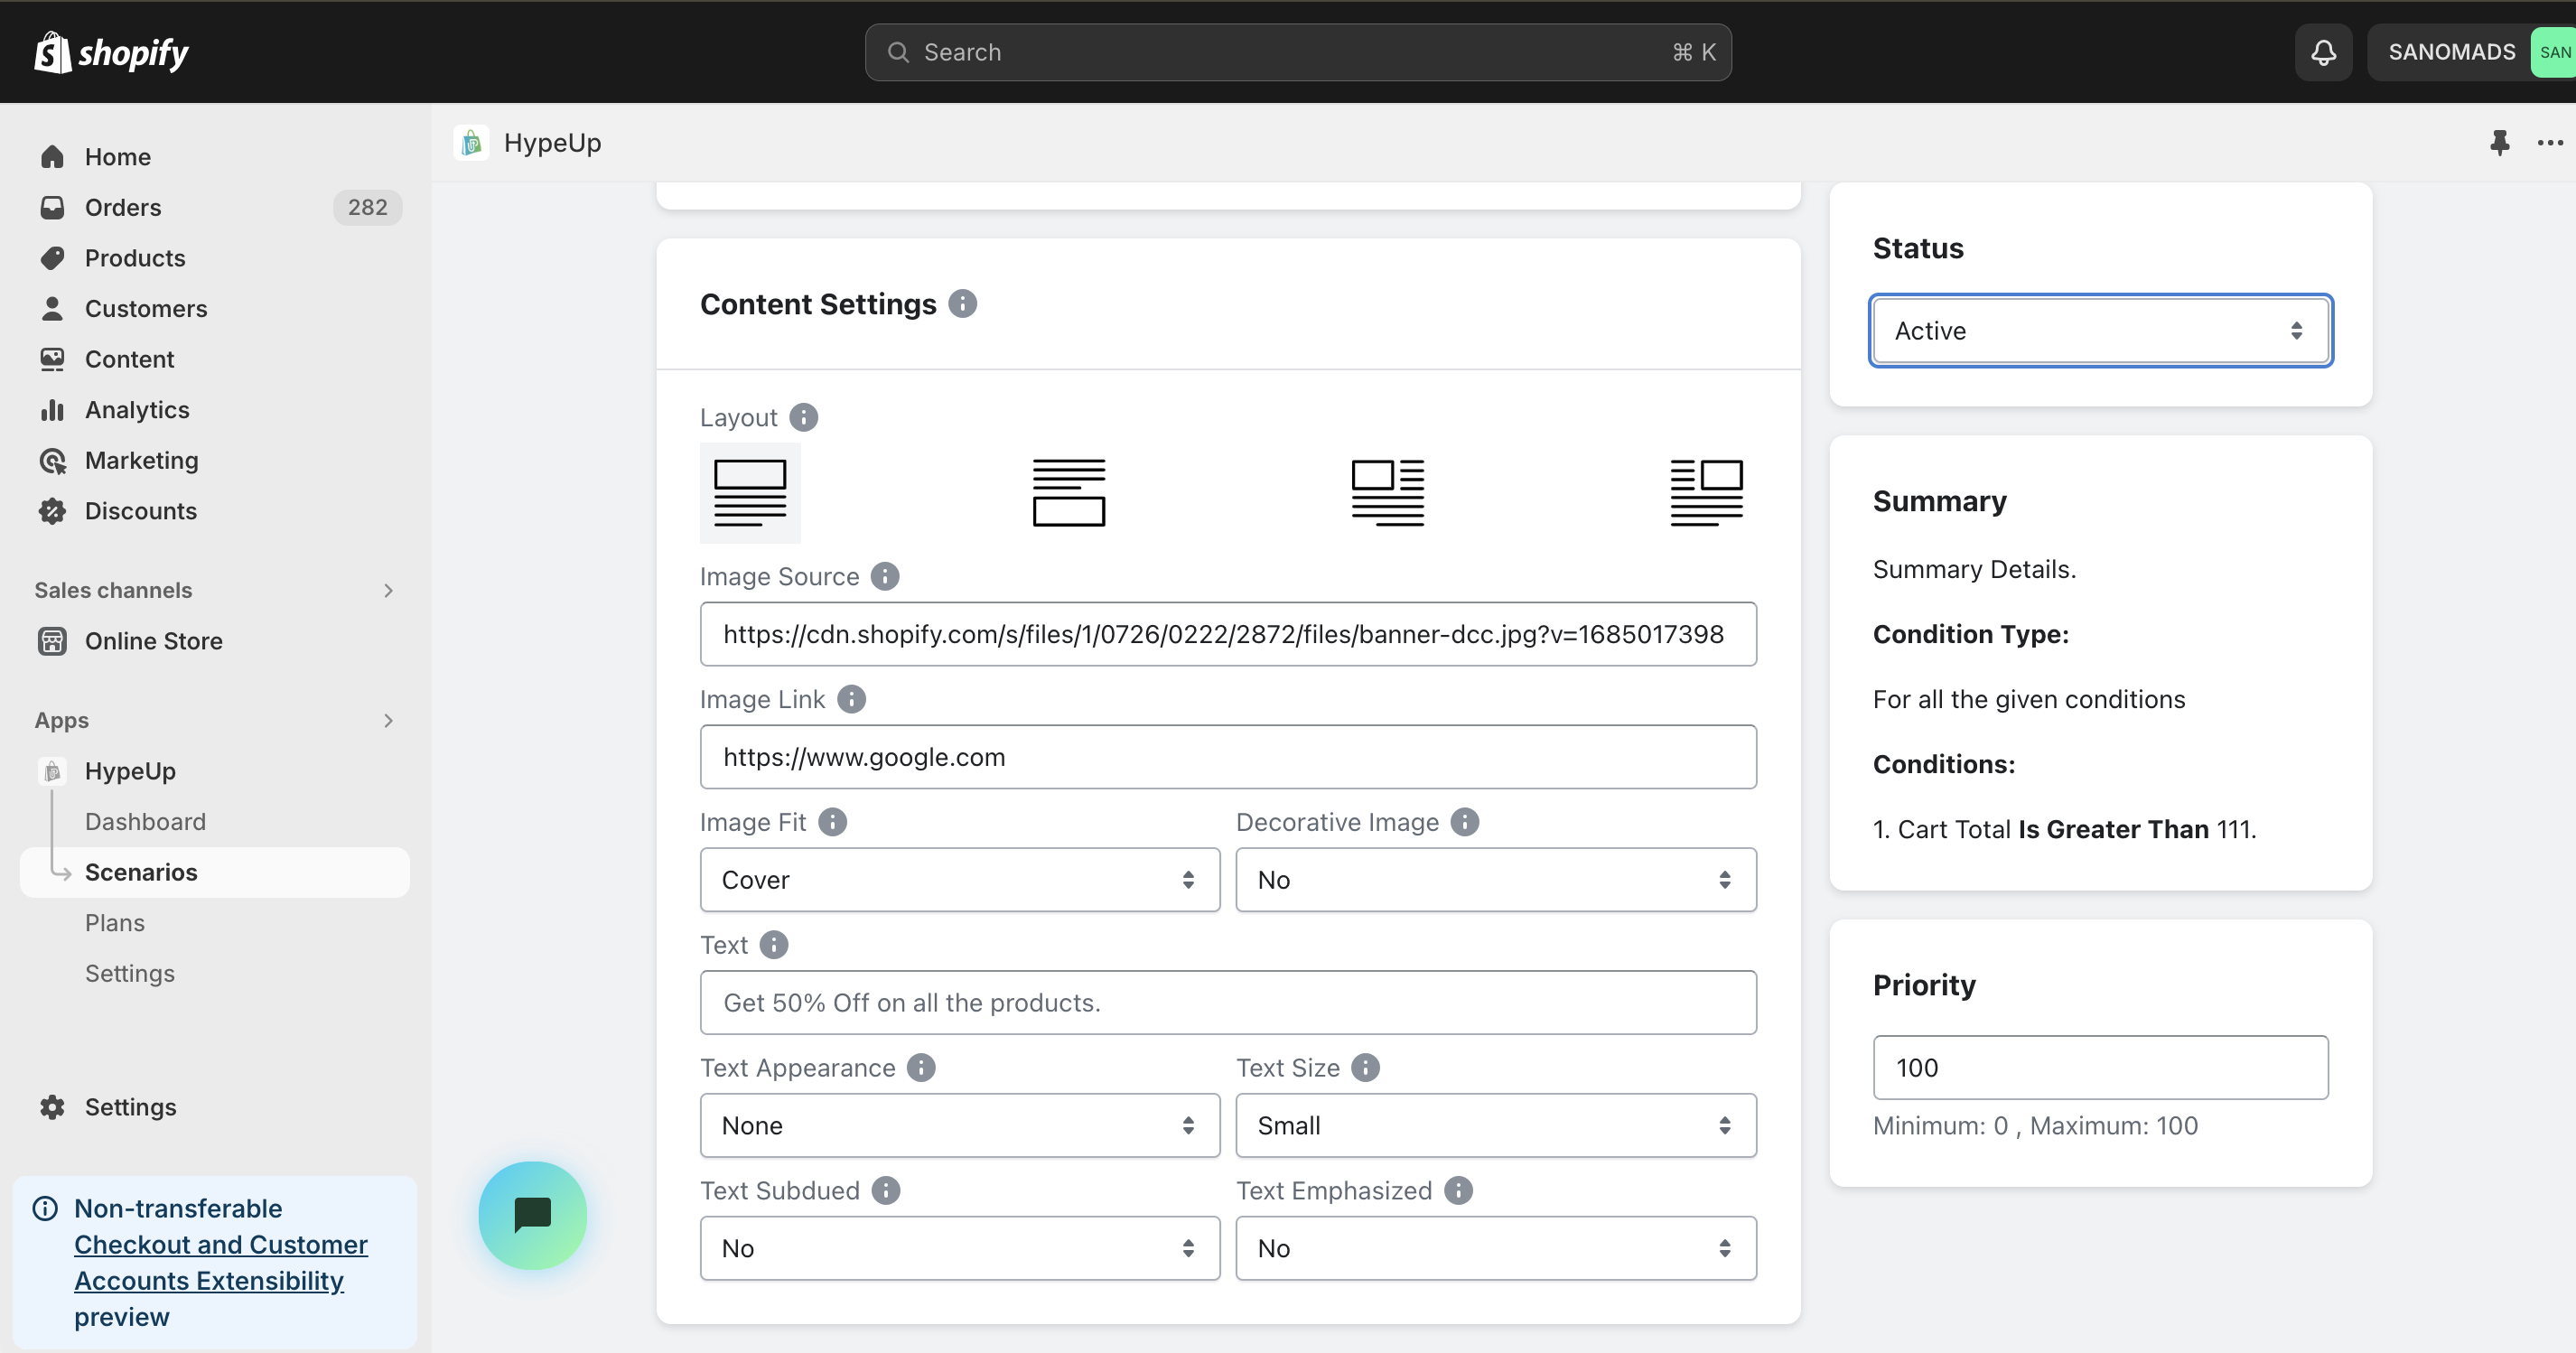
7. Adjust the <mark style="color:green;">**layout**</mark>, <mark style="color:green;">**image source**</mark> and <mark style="color:green;">**image link**</mark> for displaying the content scenario.

<figure><img src="/files/EIkbsyAvuiX1RrNO1iZf" alt="" width="563"><figcaption></figcaption></figure>

8. Change the <mark style="color:green;">**status**</mark> to active to enable the scenario.

<figure><img src="/files/weRqW8hReSL7jOsAfLPz" alt="" width="563"><figcaption></figcaption></figure>

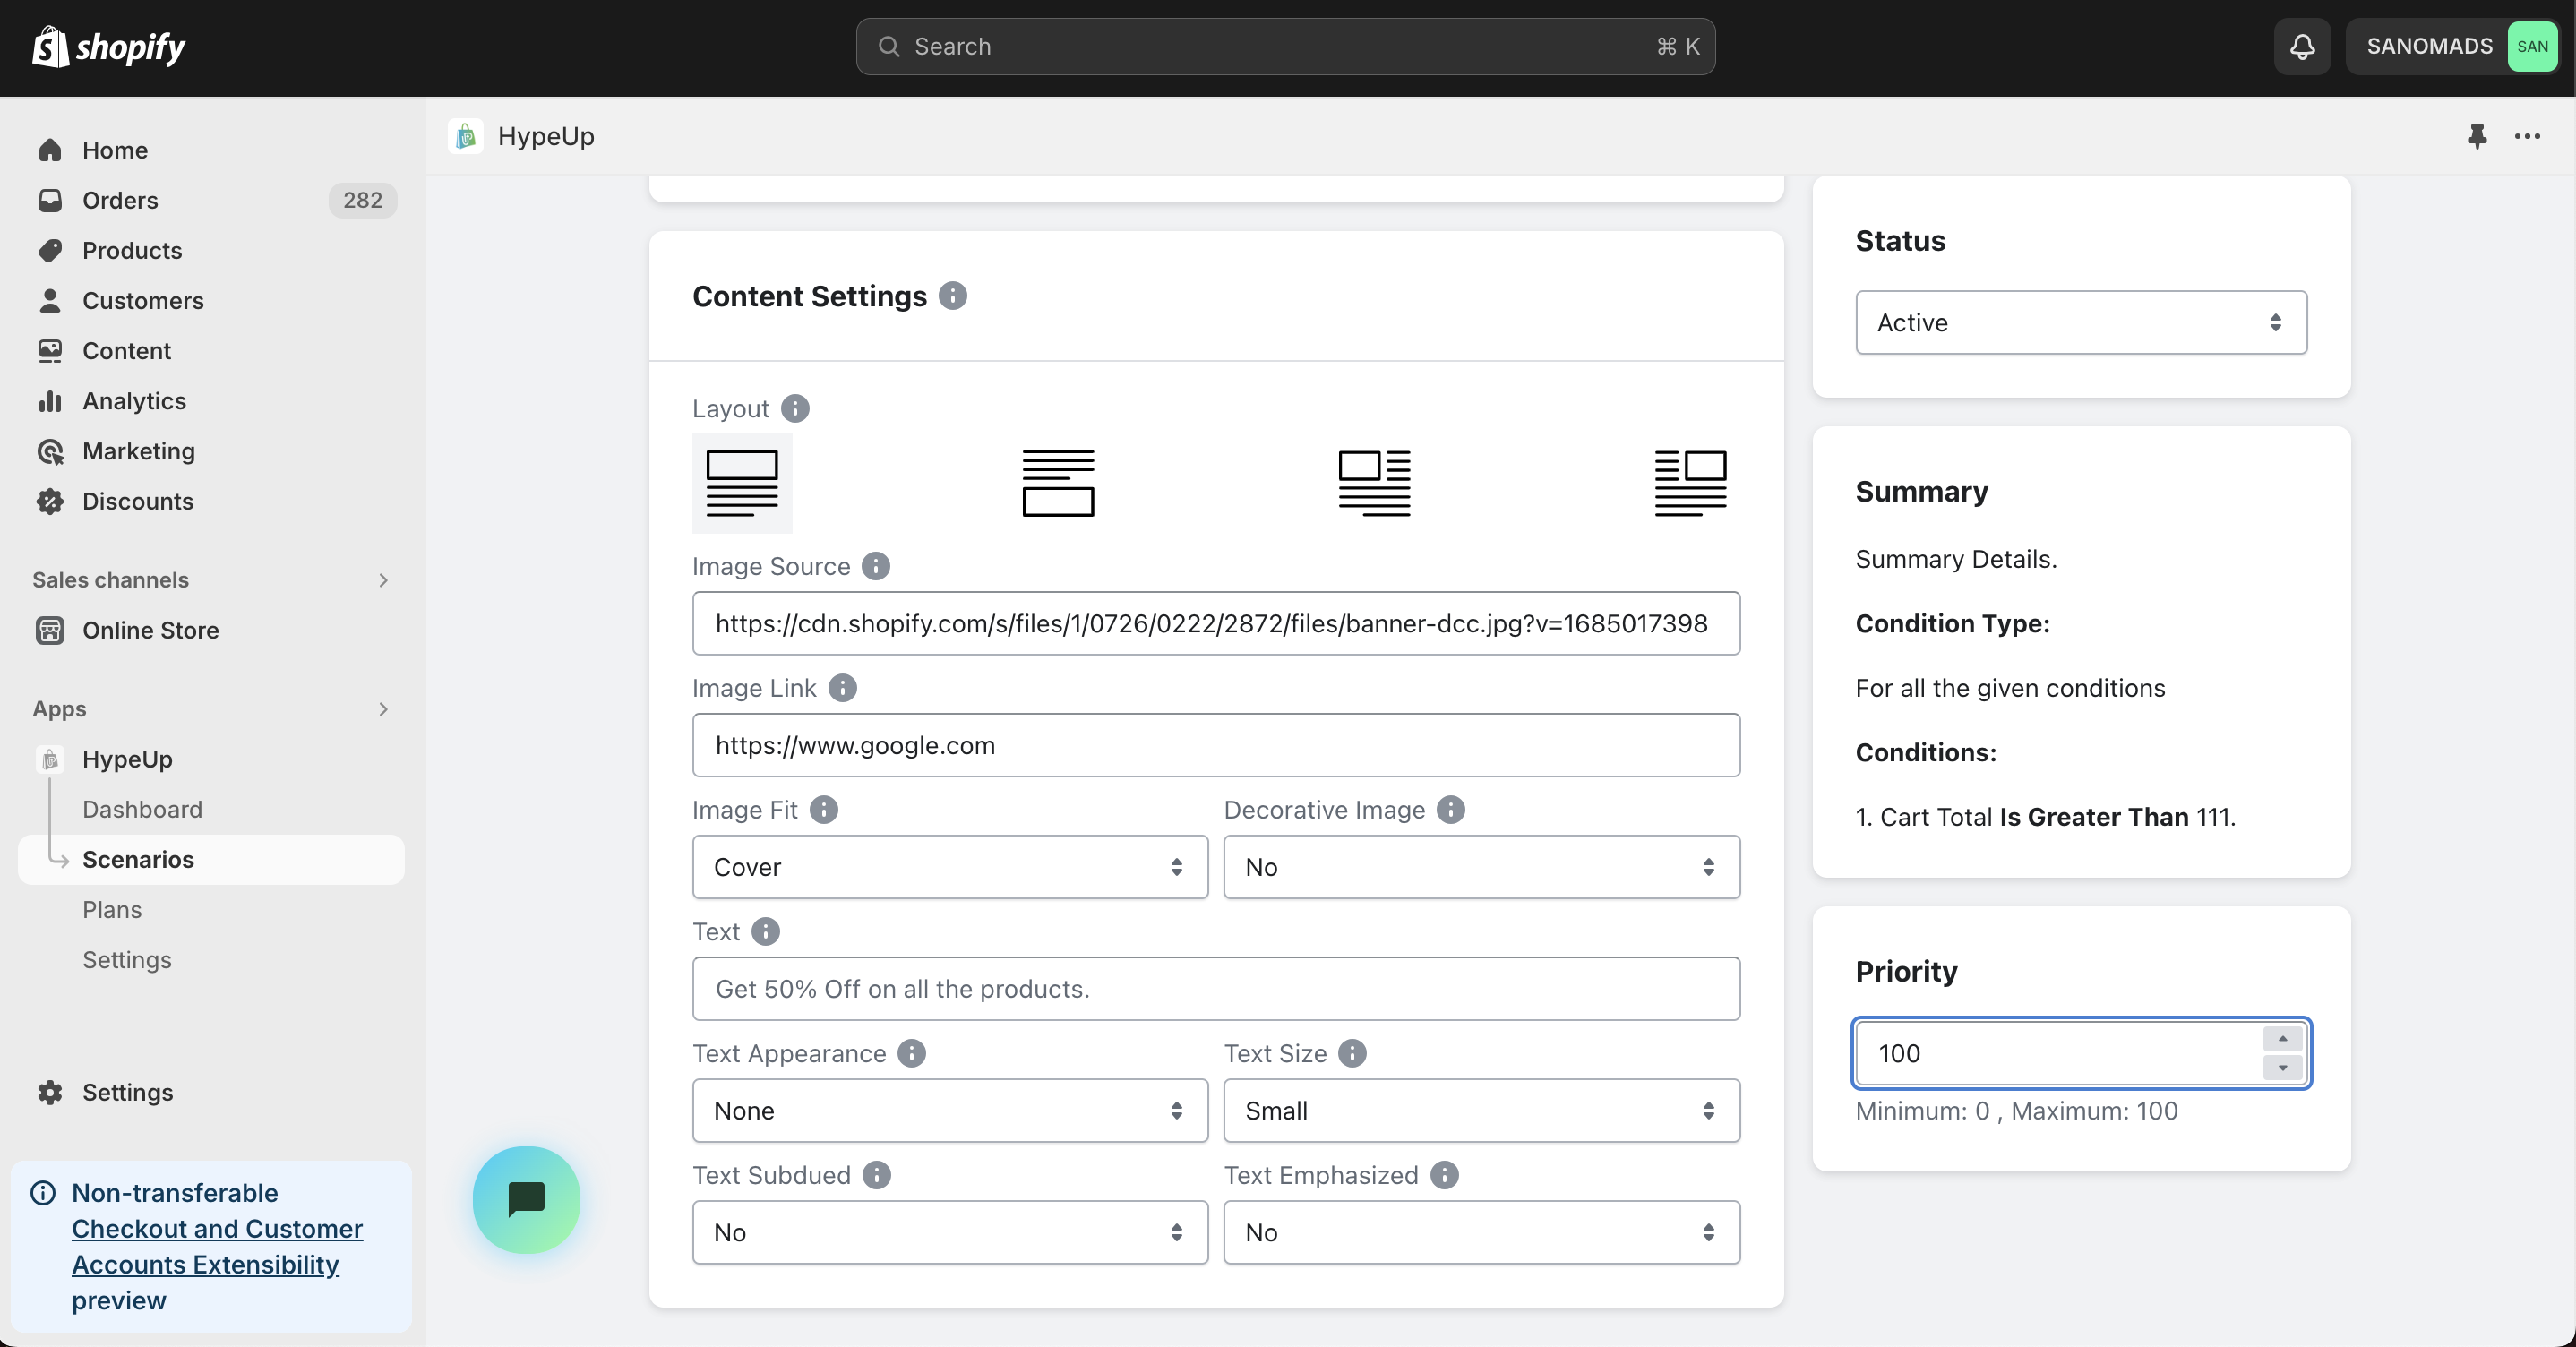
9. Adjust the <mark style="color:green;">**priority**</mark> between 0 to 100 to cover multiple use cases for the customizations.

<figure><img src="/files/53n0pz07U0yQUopgD1sQ" alt="" width="563"><figcaption></figcaption></figure>

10. Click on the <mark style="color:green;">**Save**</mark> button to save the changes.

<figure><img src="/files/0PIF6FxaenscfGwzfNkH" alt="" width="563"><figcaption></figcaption></figure>

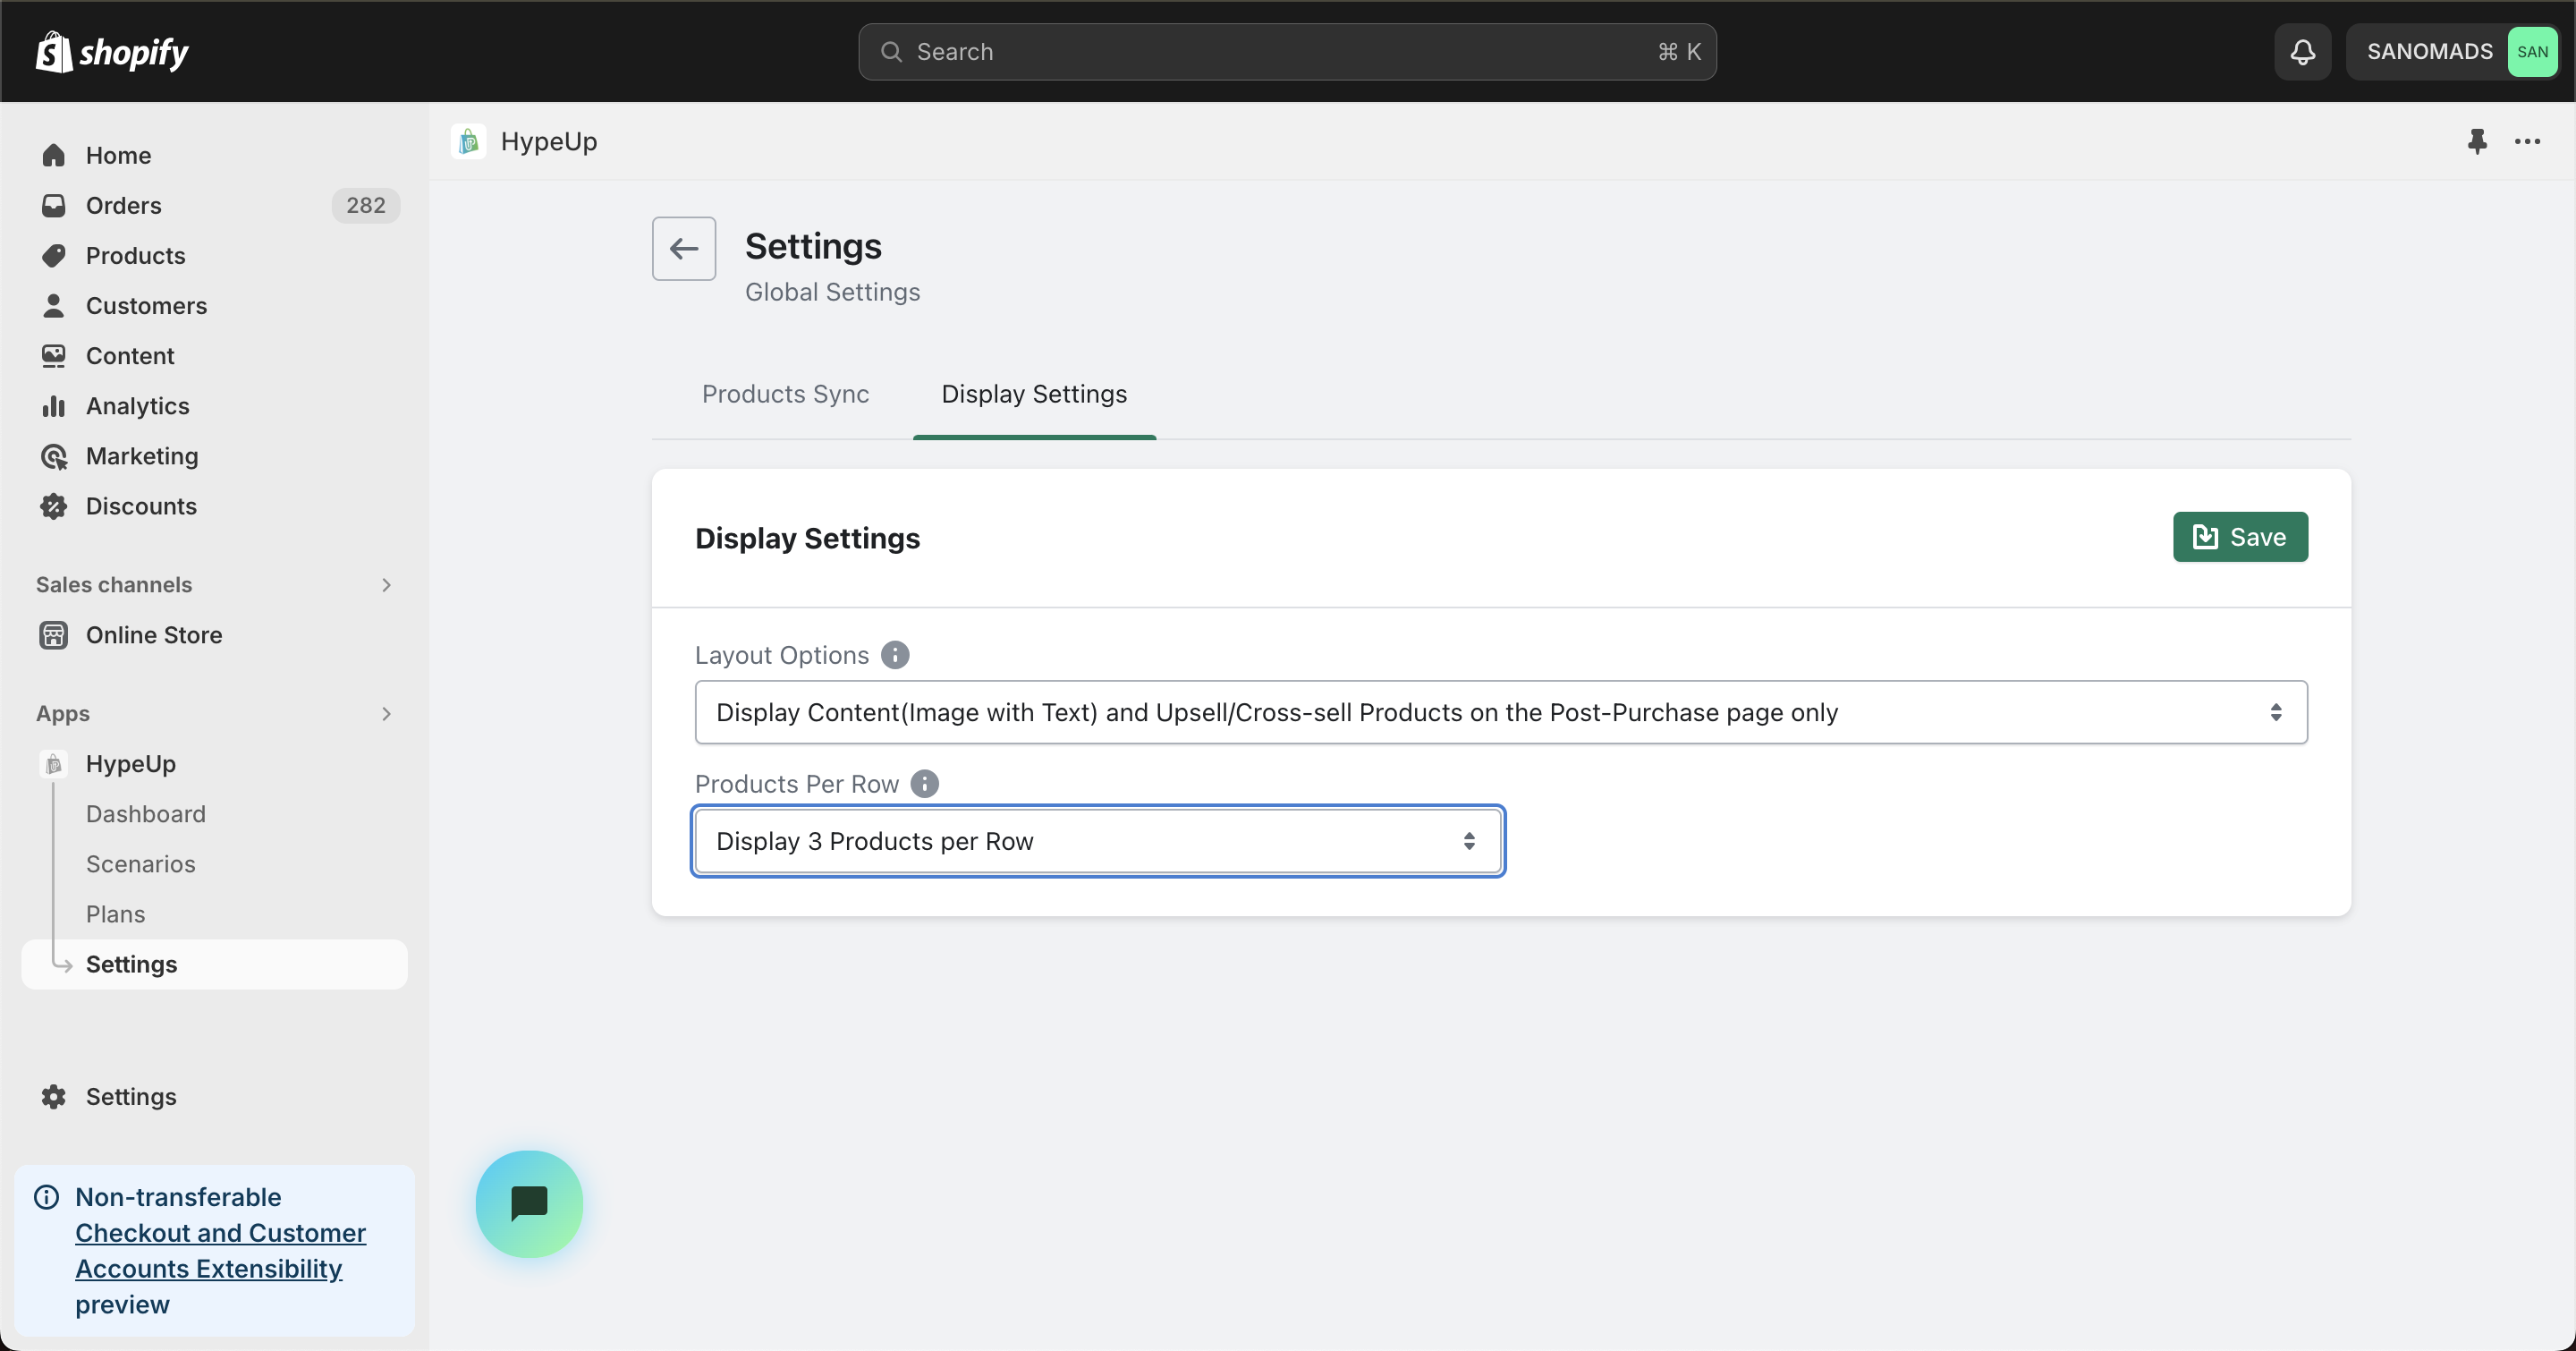
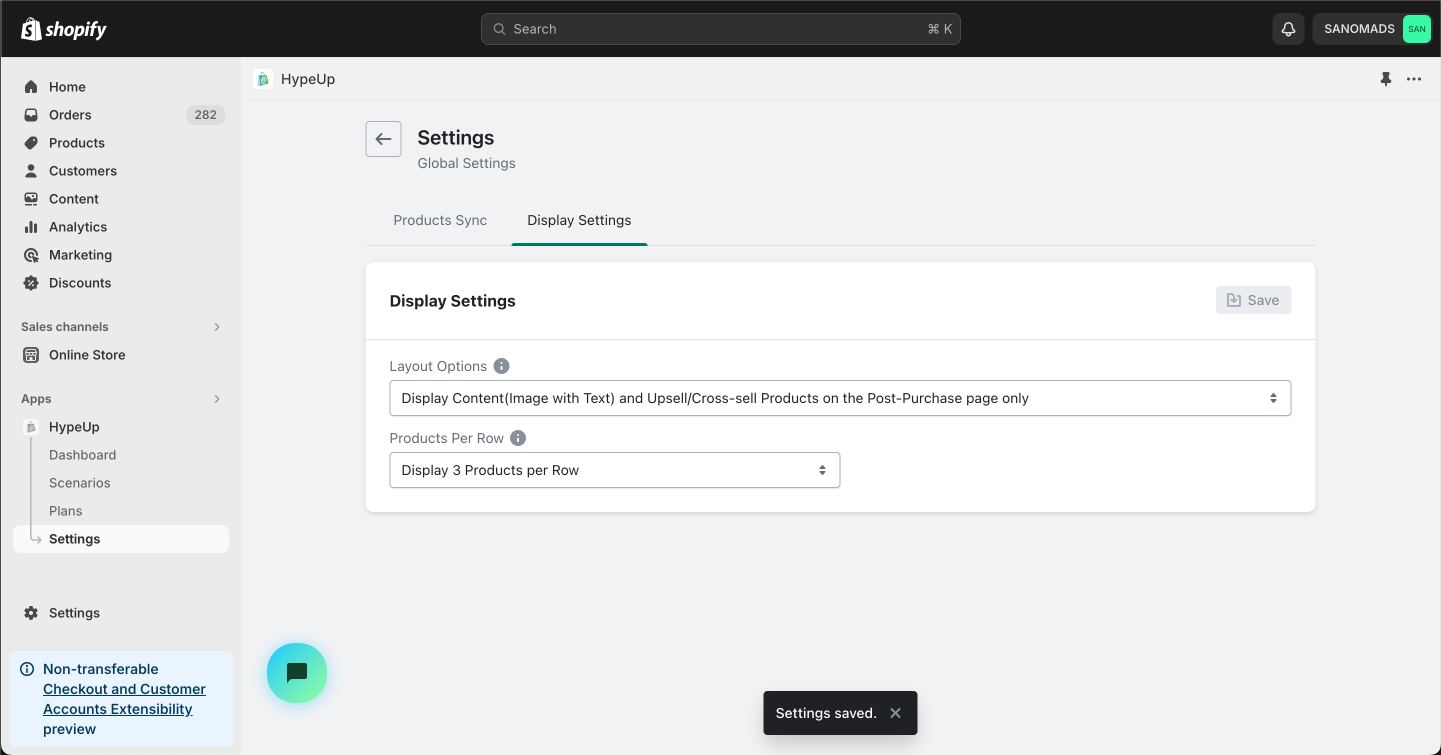
11. Go to app [<mark style="color:green;">**Settings**</mark>](https://admin.shopify.com/apps/upsell-app30/settings), click Display Settings then select a <mark style="color:green;">**Layout Option**</mark> and <mark style="color:green;">**Products Per Row**</mark> for displaying the banner and products on the Post Purchase checkout page.

<figure><img src="/files/BeKvXpb689pLOm0x4wQX" alt="" width="563"><figcaption></figcaption></figure>

12. Click on the <mark style="color:green;">**Save**</mark> button to publish the changes live for the customers on the Post Purchase checkout page.

<figure><img src="/files/Vm4YRfuhuI2YnKw6wA98" alt="" width="563"><figcaption></figcaption></figure>

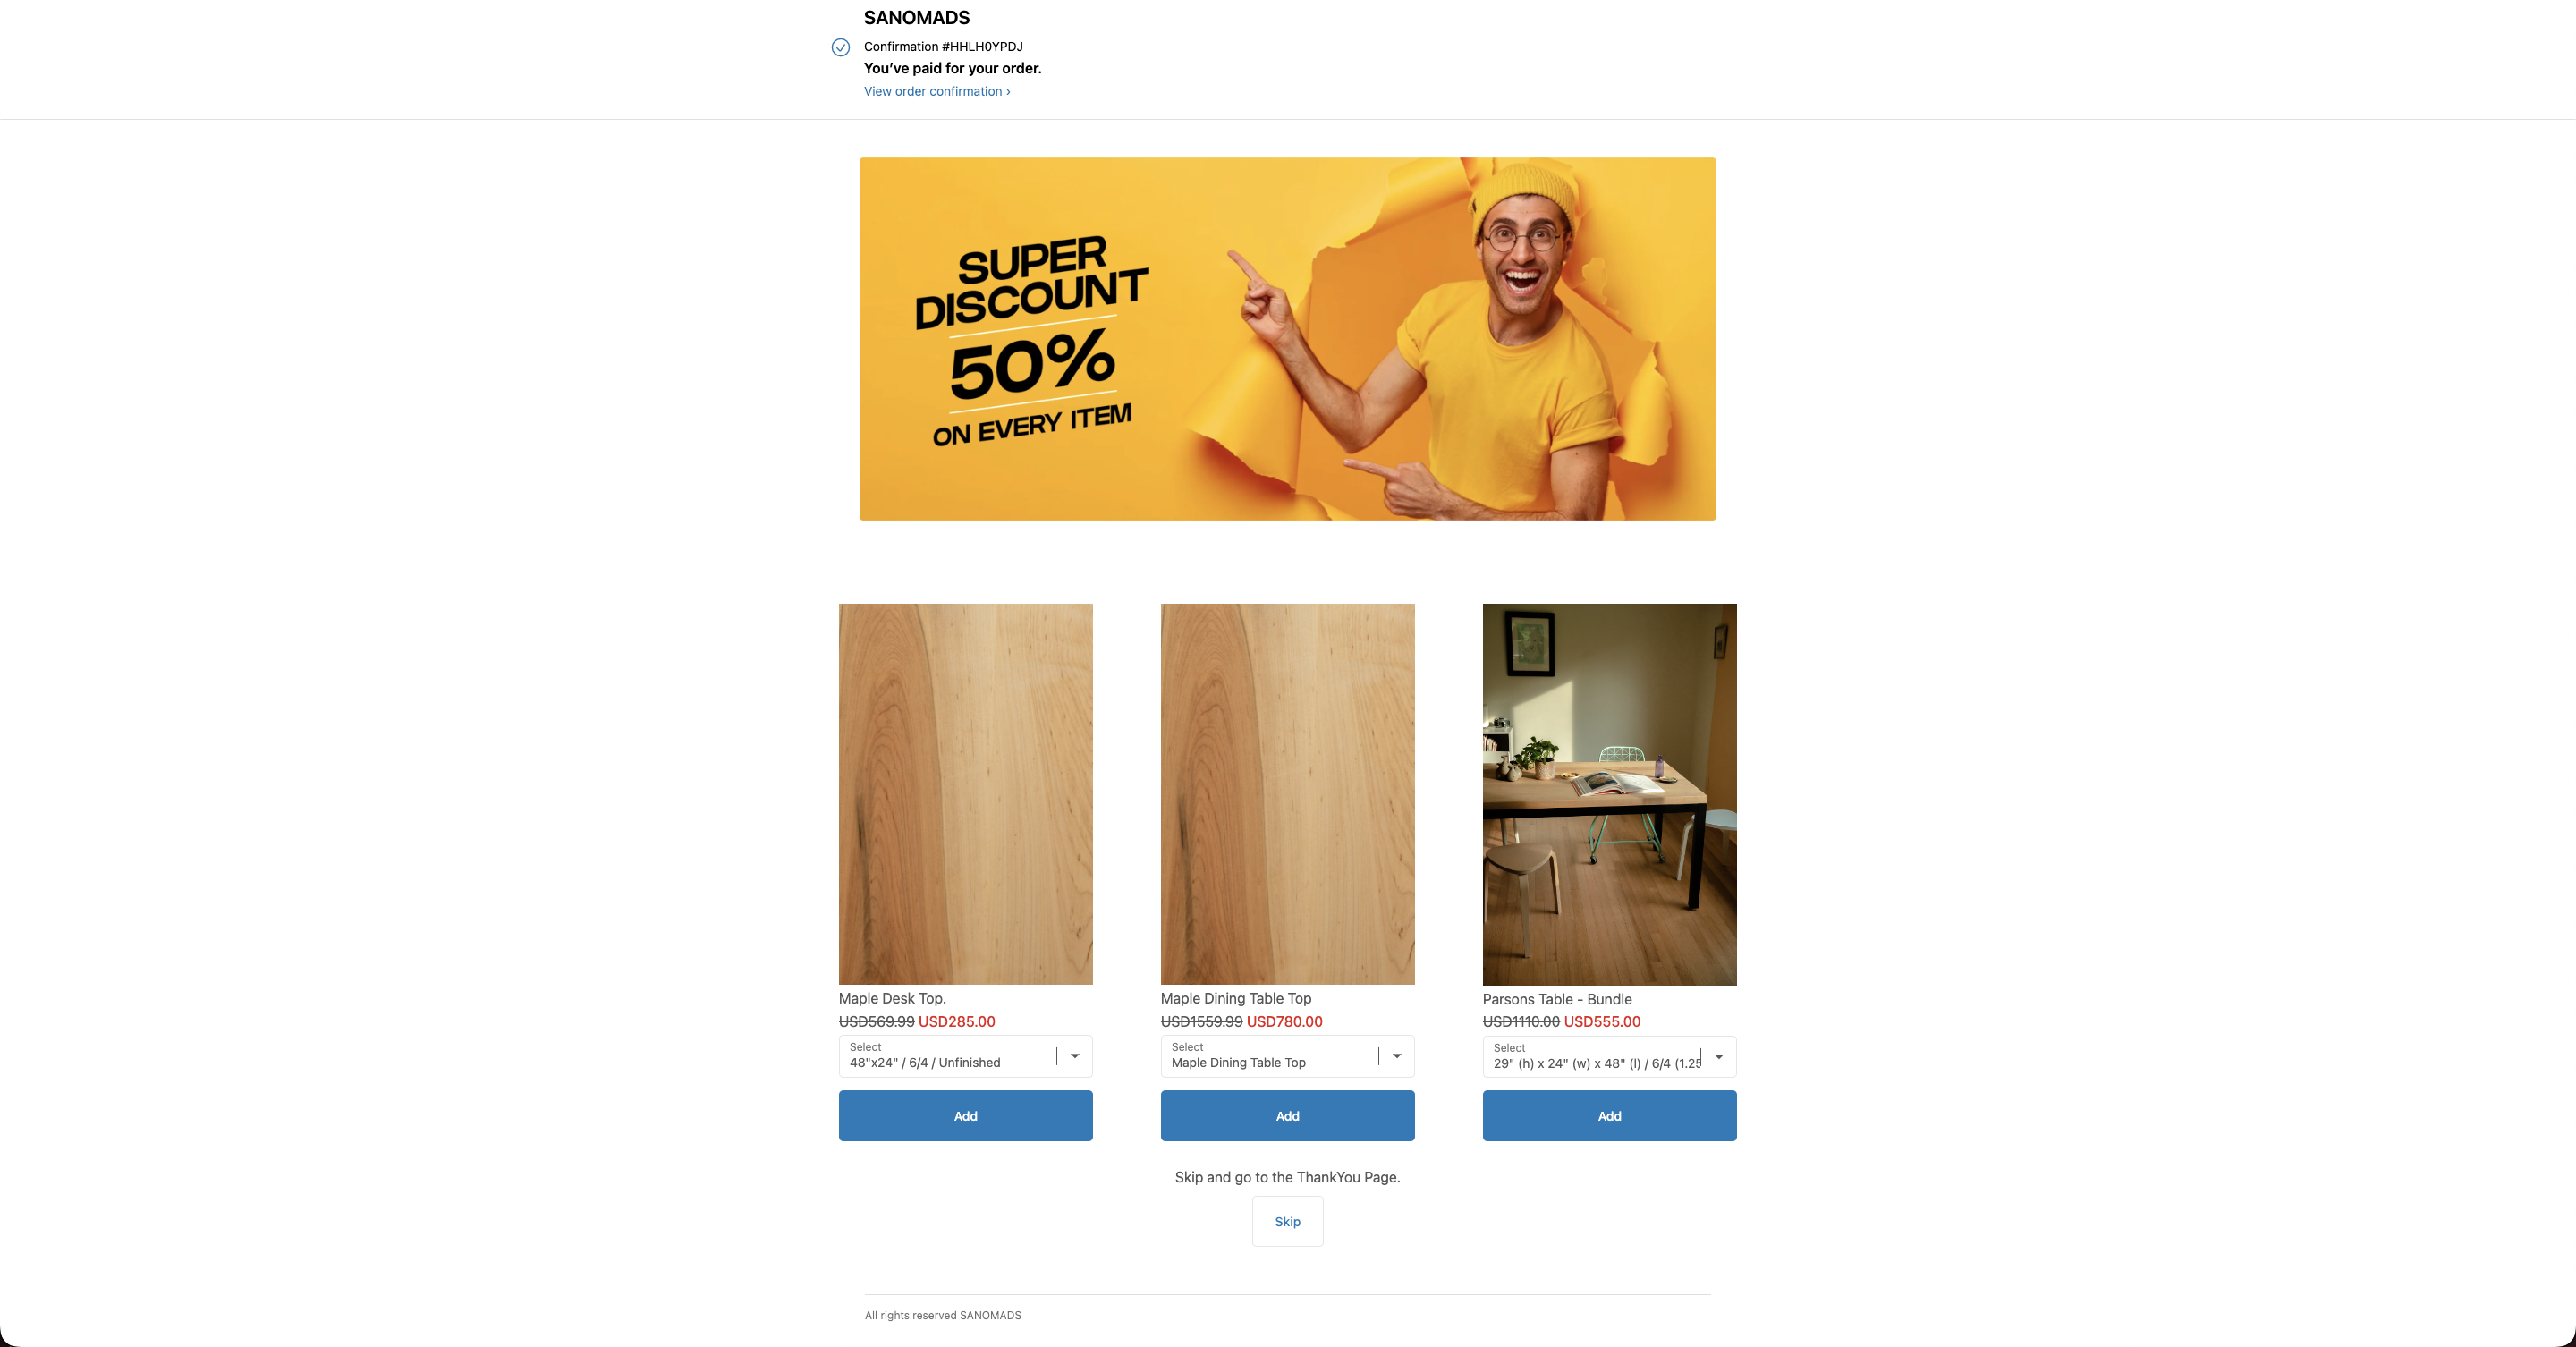
13. Create a new <mark style="color:green;">**Order**</mark> from your store and after a successful checkout, you will be able to see a post purchase page including the <mark style="color:green;">**discount image**</mark>.

<figure><img src="/files/ZQxb4lU4uRcmHaSJouyh" alt="" width="563"><figcaption></figcaption></figure>


---

# Agent Instructions: Querying This Documentation

If you need additional information that is not directly available in this page, you can query the documentation dynamically by asking a question.

Perform an HTTP GET request on the current page URL with the `ask` query parameter:

```
GET https://apps.sanomads.com/hypeup-post-purchase-upsell/use-cases/discount-image.md?ask=<question>
```

The question should be specific, self-contained, and written in natural language.
The response will contain a direct answer to the question and relevant excerpts and sources from the documentation.

Use this mechanism when the answer is not explicitly present in the current page, you need clarification or additional context, or you want to retrieve related documentation sections.