> For the complete documentation index, see [llms.txt](https://apps.sanomads.com/dynamic-checkout-customizer/llms.txt). Markdown versions of documentation pages are available by appending `.md` to page URLs; this page is available as [Markdown](https://apps.sanomads.com/dynamic-checkout-customizer/use-cases/shipping-and-customs-policies.md).

# Shipping & Customs policies

How to display <mark style="color:yellow;">**Shipping**</mark> and <mark style="color:yellow;">**Customs policies**</mark> on the Checkout using the Notifications - Content option.

{% embed url="<https://www.loom.com/share/075c07ba1d20499fa1daf4b1c78693aa?sid=baf7d02b-0be2-4ada-b22c-5e65a4cb1a46>" %}

## Guide

1. Create a new [<mark style="color:yellow;">**customization**</mark>](https://admin.shopify.com/apps/dynamic-checkout-customizer/customizations).

<figure><img src="/files/ckryZ5IcJqvmQHchyT6W" alt="" width="563"><figcaption></figcaption></figure>

2. Select the <mark style="color:yellow;">**Notifications**</mark> category.

<figure><img src="/files/dGrOcAwSpf9oqfE7bsWR" alt="" width="563"><figcaption></figcaption></figure>

3. Select <mark style="color:yellow;">**Content**</mark>, a notifications type from the options for displaying the image or text on the checkout.

<figure><img src="/files/RlEv0hhoUAyGWROeMAG9" alt="" width="563"><figcaption></figcaption></figure>

4. Select <mark style="color:yellow;">**Dynamic Render**</mark> option from the given placement options.

<figure><img src="/files/g2nvKJW90CD8HyMTC0Yw" alt="" width="563"><figcaption></figcaption></figure>

5. Add multiple <mark style="color:yellow;">**conditions**</mark> to handle the visibility of the customization on the checkout.

<figure><img src="/files/uYneZJENGwbop1GjfABv" alt="" width="563"><figcaption></figcaption></figure>

6. Adjust the <mark style="color:yellow;">**content settings**</mark> for the content customization block which includes <mark style="color:yellow;">**text**</mark>, <mark style="color:yellow;">**text**</mark> <mark style="color:yellow;">**appearance**</mark>, <mark style="color:yellow;">**text size**</mark> and <mark style="color:yellow;">**text alignment**</mark>.

<figure><img src="/files/9oYygpIJ5dzOwUGM1Emx" alt="" width="563"><figcaption></figcaption></figure>

7. Change the <mark style="color:yellow;">**status**</mark> to active to enable the customization block.

<figure><img src="/files/9IURkQOpht4sIpgaG6jJ" alt="" width="563"><figcaption></figcaption></figure>

8. Adjust the <mark style="color:yellow;">**priority**</mark> between 0 to 100 to cover multiple use cases for the customizations.

<figure><img src="/files/biPsNy3BEFxDtN5LsGyr" alt="" width="563"><figcaption></figcaption></figure>

9. In the <mark style="color:yellow;">**placement**</mark> tab, copy the placement ID which will be used on the checkout page.

<figure><img src="/files/YDO5AG0HrUiBcD6HSXoj" alt="" width="563"><figcaption></figcaption></figure>

10. Click on the <mark style="color:yellow;">**Save**</mark> button to save the changes.

<figure><img src="/files/GDNG7WK8dldV7GJ11GEb" alt="" width="563"><figcaption></figcaption></figure>

11. Go to store [<mark style="color:yellow;">**Settings**</mark>](https://admin.shopify.com/settings), click Checkout and then select a checkout profile and click on <mark style="color:yellow;">**customize**</mark> button to start the customization process.

<figure><img src="/files/QEG4vdai9S6VSPxiiFGm" alt="" width="563"><figcaption></figcaption></figure>

12. In the [<mark style="color:yellow;">**Checkout editor**</mark>](https://admin.shopify.com/settings/checkout/editor), click on the <mark style="color:yellow;">**Add app block**</mark> button located at the bottom left corner of the page.

<figure><img src="/files/dV5yZqmMYcIwNeEJSnqf" alt="" width="563"><figcaption></figcaption></figure>

{% hint style="info" %}
Make sure you that you have placed the app block at the same placement as selected in the app.
{% endhint %}

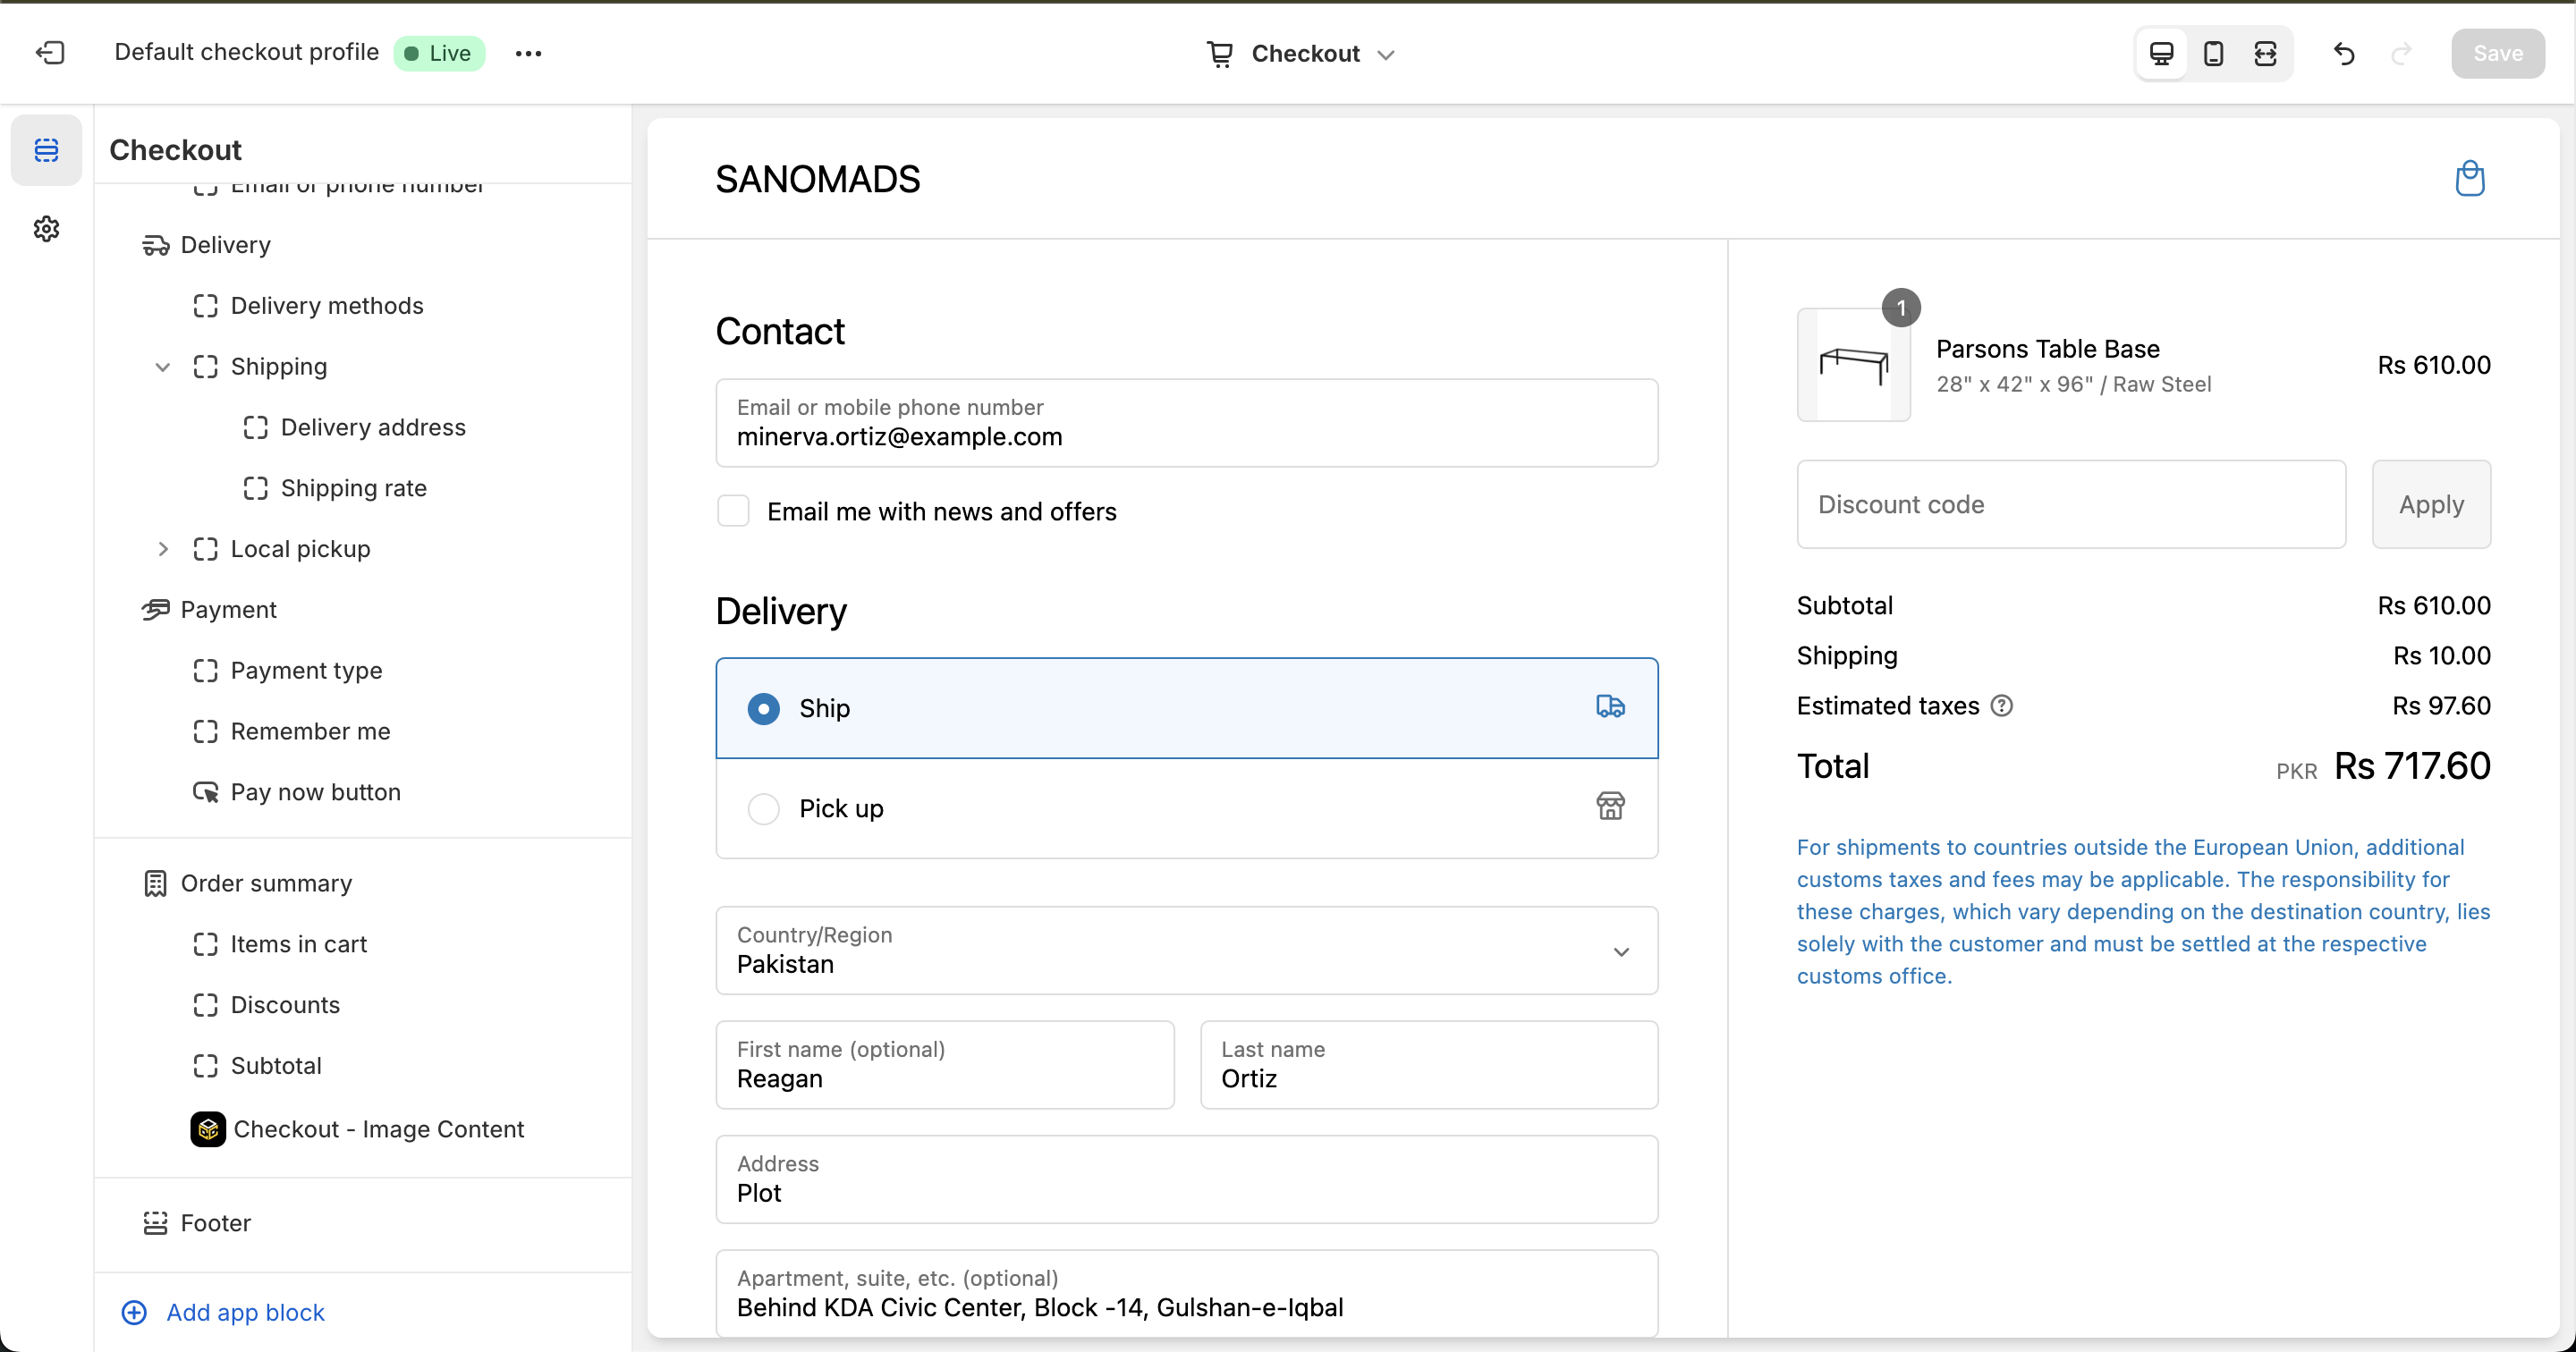
13. Select the <mark style="color:yellow;">**Checkout - Image Content**</mark> app block, drag and drop the app block at the desired location and paste the placement ID to view the customization block.

<figure><img src="/files/xX6klovUAmUeV87UCDKu" alt="" width="563"><figcaption></figcaption></figure>

14. Click on the <mark style="color:yellow;">**Save**</mark> button to publish the changes live for the customers.

<figure><img src="/files/57kAfWIvqO5Fd6N2xdaW" alt="" width="563"><figcaption></figcaption></figure>

## Why does it matter?

[Gimaguas](https://gimaguas.com/) is using <mark style="color:yellow;">**Notifications -> Content**</mark> customization for displaying Shipping or Customs policies and improved their Brand Reputation by their 5%.