> For the complete documentation index, see [llms.txt](https://apps.sanomads.com/hypeup-post-purchase-upsell/llms.txt). Markdown versions of documentation pages are available by appending `.md` to page URLs; this page is available as [Markdown](https://apps.sanomads.com/hypeup-post-purchase-upsell/use-cases/promotional-banner.md).

# Promotional Banner

How to display <mark style="color:green;">**Promo Shipping Banners**</mark> on Post Purchase checkout page using the <mark style="color:green;">**Notifications -> Banner**</mark> option? A Step by Step Guide.

{% embed url="<https://drive.google.com/file/d/1zuliZLsh7_VFBNuEYJxf1GWzfSAy9U5F/view?usp=drive_link>" %}

## Guide

1. Go to the store [<mark style="color:green;">**Settings**</mark>](https://admin.shopify.com/settings) <mark style="color:green;">**->**</mark> [<mark style="color:green;">**Checkout**</mark>](https://admin.shopify.com/settings/checkout).

<figure><img src="/files/6yiROaDhMx1euO5aXRnH" alt="" width="563"><figcaption></figcaption></figure>

2. Make sure that the [<mark style="color:green;">**HypeUp - Post Purchase app**</mark>](https://admin.shopify.com/apps/upsell-app30) is selected for the post purchase page.

<figure><img src="/files/gfiAO3nZhayCz0Vhw7XX" alt="" width="563"><figcaption></figcaption></figure>

3. Create a new [<mark style="color:green;">**Scenario**</mark>](https://admin.shopify.com/apps/upsell-app-30/scenarios).

<figure><img src="/files/gEgXCRSRa3lVDa4cU36N" alt="" width="563"><figcaption></figcaption></figure>

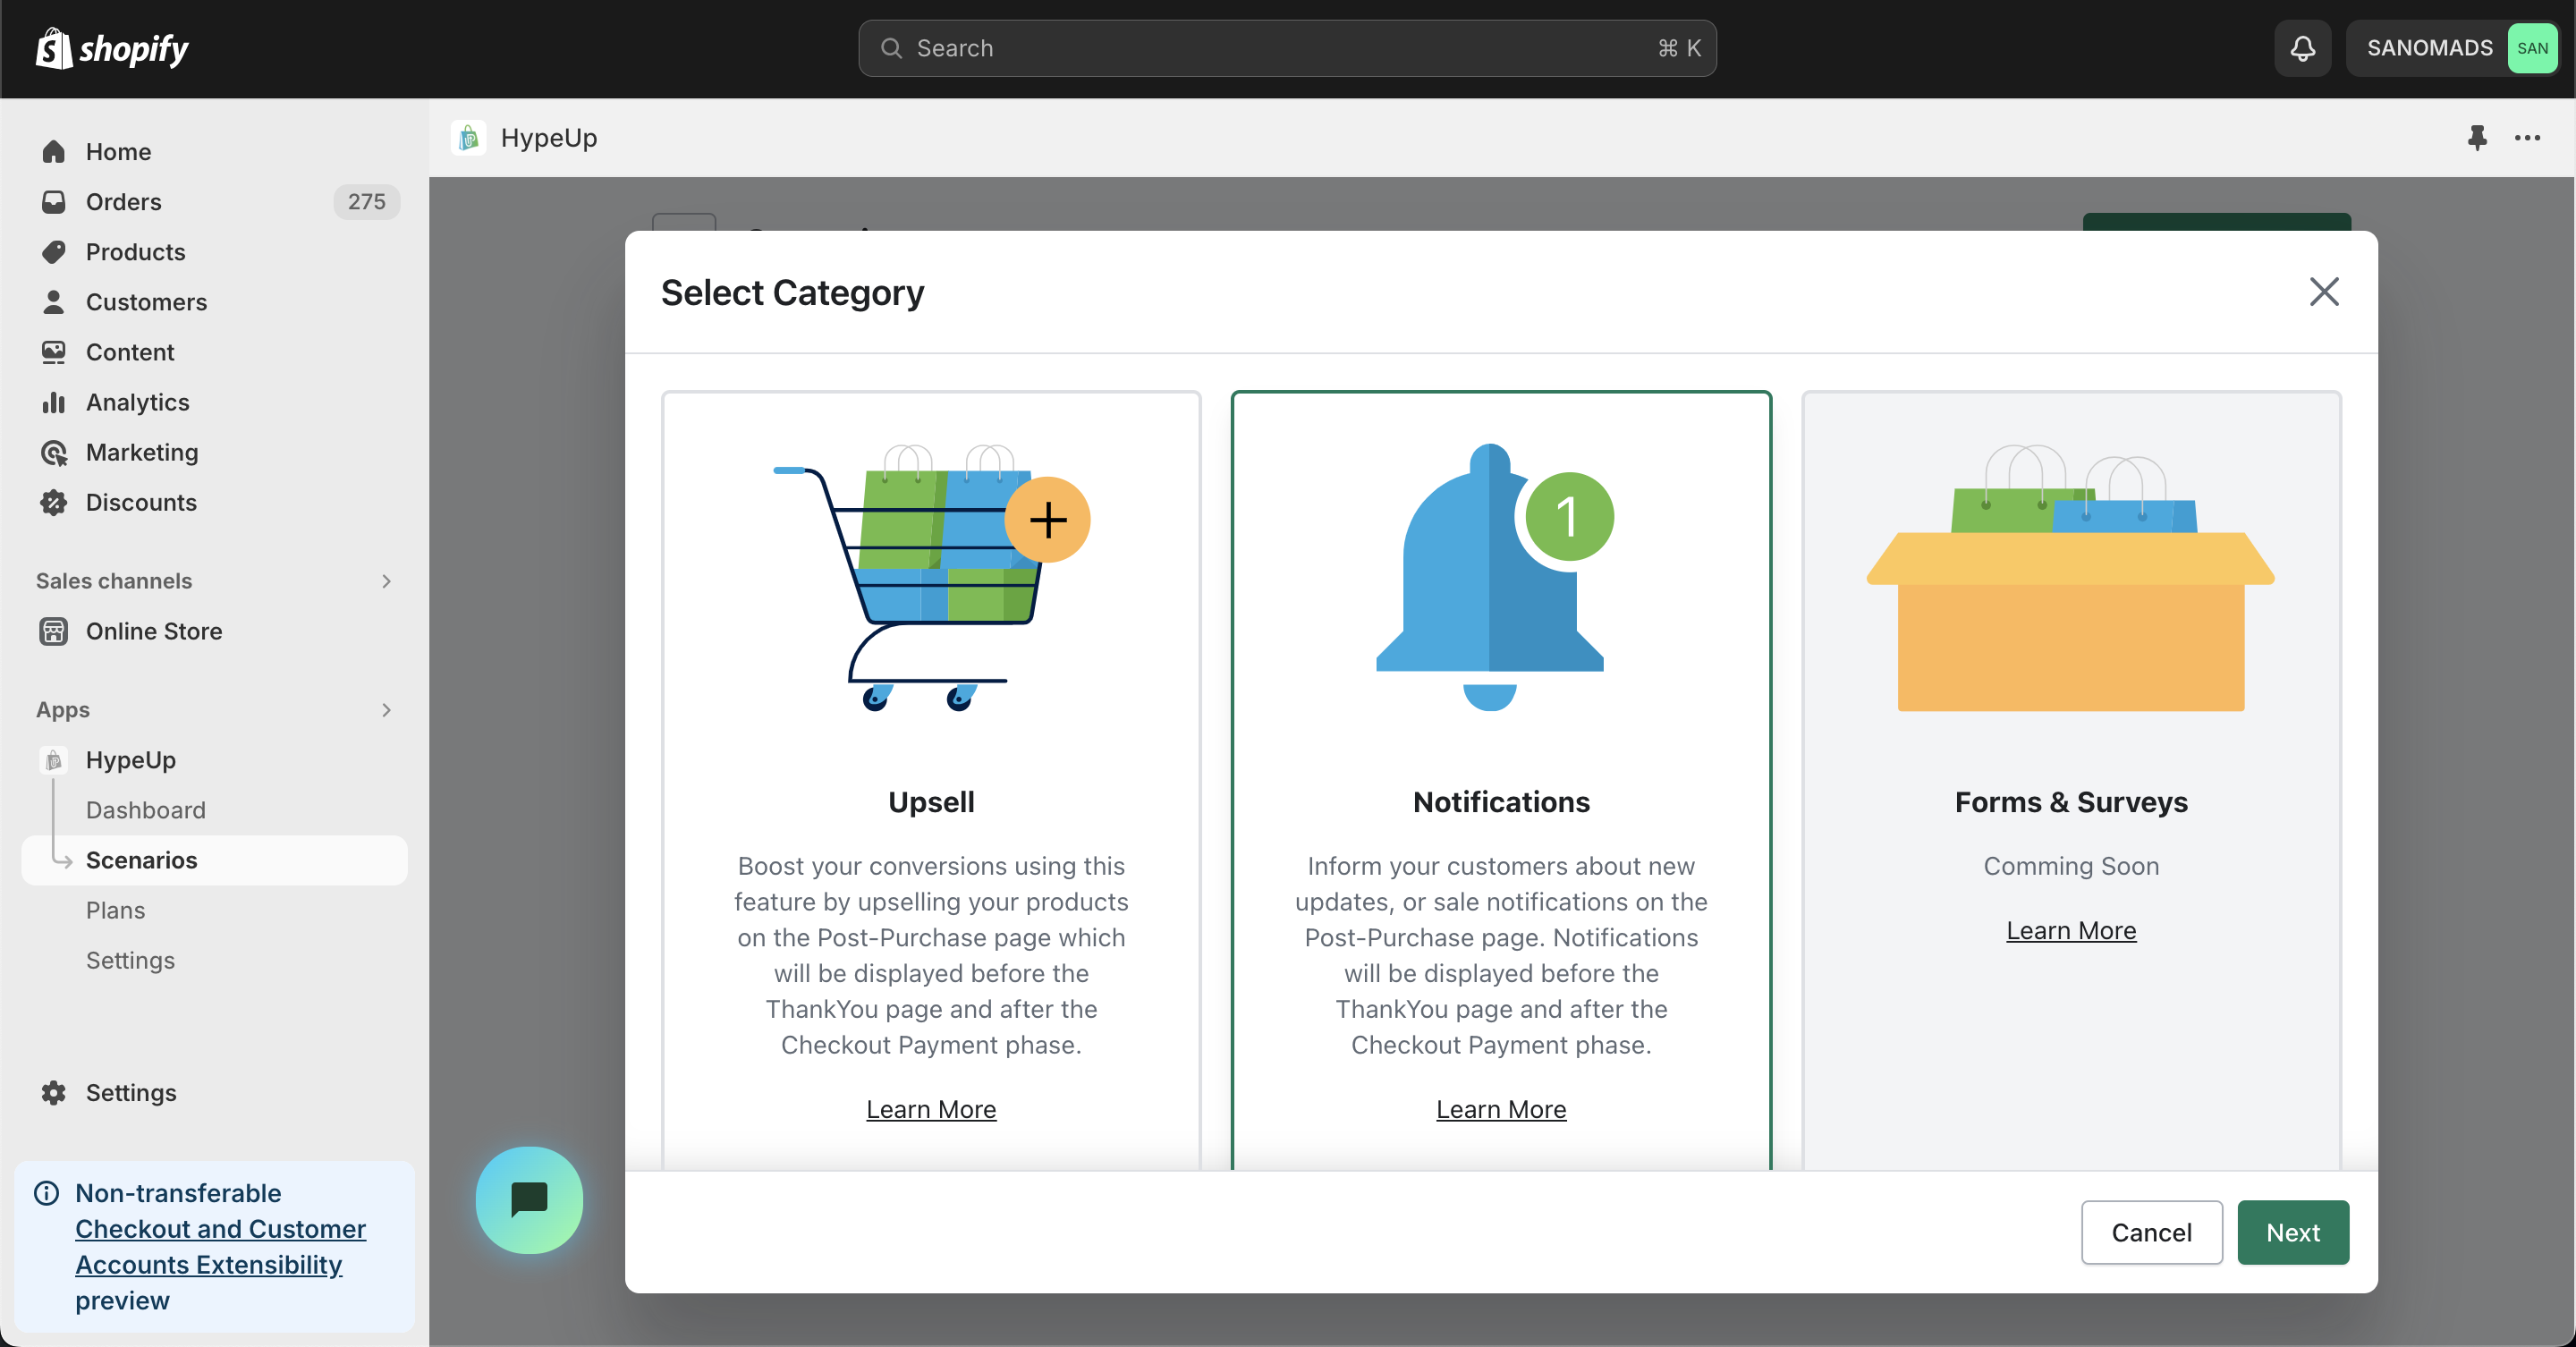
4. Select the <mark style="color:green;">**Notifications**</mark> category.

<figure><img src="/files/7oxX3YwXW7a0vq3nPc40" alt="" width="563"><figcaption></figcaption></figure>

5. Select <mark style="color:green;">**Banner**</mark>, a notifications type from the options for displaying the banner on the post purchase checkout page.

<figure><img src="/files/E36UIFkdw6xZapG4jHcQ" alt="" width="563"><figcaption></figcaption></figure>

6. Add multiple <mark style="color:green;">**conditions**</mark> to handle the visibility of the scenario on the post purchase checkout page.

<figure><img src="/files/xevKZis4FrWOGknzRdGk" alt="" width="563"><figcaption></figcaption></figure>

7. Adjust the <mark style="color:green;">**type**</mark> and <mark style="color:green;">**title**</mark> for the banner scenario.

<figure><img src="/files/gy1STB5EGQBJaeS9lYDJ" alt="" width="563"><figcaption></figcaption></figure>

8. Change the <mark style="color:green;">**status**</mark> to active to enable the scenario.

<figure><img src="/files/sn42ieoshpUJwxlxguON" alt="" width="563"><figcaption></figcaption></figure>

9. Adjust the <mark style="color:green;">**priority**</mark> between 0 to 100 to cover multiple use cases for the customizations.

<figure><img src="/files/dvGdgdUhso4hAyGuWcHS" alt="" width="563"><figcaption></figcaption></figure>

10. Click on the <mark style="color:green;">**Save**</mark> button to save the changes.

<figure><img src="/files/XIt3d2CtcxHT5CBOaRSq" alt="" width="563"><figcaption></figcaption></figure>

11. Go to app [<mark style="color:green;">**Settings**</mark>](https://admin.shopify.com/apps/upsell-app30/settings), click Display Settings then select a <mark style="color:green;">**Layout Option**</mark> and <mark style="color:green;">**Products Per Row**</mark> for displaying the banner on the Post Purchase checkout page.

<figure><img src="/files/vFTZ7HE2ZuAk5gbhc5GZ" alt="" width="563"><figcaption></figcaption></figure>

12. Click on the <mark style="color:green;">**Save**</mark> button to publish the changes live for the customers on the Post Purchase checkout page.

<figure><img src="/files/hkfdAva0FBVf8tvYKLDo" alt="" width="563"><figcaption></figcaption></figure>

13. Create a new <mark style="color:green;">**Order**</mark> from your store and after a successful checkout, you will be able to see a post purchase page including the <mark style="color:green;">**promotional shipping banner**</mark>.

<figure><img src="/files/TDgc7HeGGuxMiMgAfofR" alt="" width="563"><figcaption></figcaption></figure>